Please visit our home site at www.TRILOBOATS.com.

Anke and I live aboard WAYWARD, and wrote about it's design and construction at ABargeInTheMaking.blogspot.com.

Access to the net comes and goes, so I'll be writing in fits and spurts.Please feel free to browse the archives, leave comments where you will and write... I'll respond as I can.

Fair winds!

Dave and Anke
triloboats swirly gmail daughter com

Showing posts with label Galley. Show all posts

Tuesday, December 5, 2023

A DIY Rocket Stove Smoke Hood


Eco-Zoom Rocket Stove with DIY Smoke Hood


Somebody who claims to speak for the ‘hood don’t need no private jet.

– Chuck D


A DIY Rocket Stove Smoke Hood


About half of the energy in wood literally goes up in smoke, and with it, a good deal of our own! If the smoke can be burned, efficiency nearly doubles. The corollary is that only half as much fuel produces a given amount of heat.


Rocket Stoves were developed as a low-tech solution. At their heart is an L shaped, insulated tunnel, wide open at both ends. Fuel is fed horizontally, oxygenation and combustion burn hot at the crux, and what little smoke is left is pushed vertically, up and out the top. Typically, a pot directly atop the stove absorbs heat from the hot, gaseous outflow for cooking.


We’ve been using an EcoZoom Rocket Stove for years as a nearly smoke-free, otherwise open deck fire for outdoor cooking in hot weather, an evening blaze in nice weather and to heat metals for various projects (it easily takes ferrous metals to red-hot). It runs on limbwood from about thumb to wrist size, the former for cooking and the latter for longer, more subdued heat. In short, perfect for easy wood-gathering, especially as we age..


In planning MUSTELID, we hoped to bring this marvel indoors for cooking and heating. It requires far less wood to gather, dry and store within her small volume. Being insulated, wood can be dried directly alongside the stove, warm but nowhere near wood’s flashpoint (we can touch the stove sides without burning!).


To bring it indoors, we must gather and direct combustion gasses outboard, like any other onboard stove. The solution is a smoke hood fit snugly over the stovetop with a stack, which has the extra perk of increasing the cooking surface area. We wanted one more feature… we wanted to easily install and remove the stove for outdoor use on deck or ashore. So we went for a swing-up, cantileverd variation.


This called for some head scratching…


Grate spacer for airflow under,

Ash tray…

Whole thing slides aft behind bulkhead lip

And between heat / splatter shields.


Removed...
Note black fire-retardant pad
protecting carpet from sparks


Swing hood upward to remove


A look under the hood...
a vertical ring fits closely over upper plate
for extra fume collection


*****


Smoke Hood Plan
Not to Scale


Smoke Hood Elements


At it’s simplest, the hood is a flattish box made from sheet metal (in our case, stainless steel from and old stove’s grease trap… a heavier top plate has better thermal mass for cooking, if available. A large hole in the bottom fits closely over the Rocket Stove top, while a smaller hole in the top has stovepipe fit into it, which leads to a standard deck-jack and smokehead. If you leave the stove in pace, this is all you need.


For a swing-up top – allowing removal of the stove – we broke the hood into two boxes, each with an open end:


  1. The far box is fixed (in our case to bulkhead and flanking heatshields), with the flue let into its upper surface. Its near end is open, with rounded shoulders and an under-lip. This part is female, slightly larger than the second part.

  2. The near box is cantilevered (stops may be additionally fitted to help support heavy pots). Its far end is open, with a partial rounded shoulder fairing to 45deg… extending an over-lip, while the angled section limits upward swing. This part is male, slightly smaller than the first part. Insert its open end into the female’s until their respective hinge-pin holes align.


Other parts:


  • The long hinge pin (alternatively, short, opposing pins) are let through paired holes centered on the shoulders. If it binds while swinging upward, grind away from the lower male shoulders till clear.

  • A vertical smoke collar can be used around the stove-top cut–out (not sure it’s necessary). We used a strap of sheet metal, its edges doubled over just short of its outer mid-line (result about one inch wide) and tabbed around its outer mid-line (tabs bent alternately, slightly away from cut-out). When pressed into place, it ‘snaps’ in to lock. It works best to cut the tabs before bending.

  • Rims, rails, bars and what-have-you may be added to secure pots while cooking underway. In our case, we added a low front rim and let that and tall heat / splatter shields along each side contain pots. Watch for swing-up clearance.


Notes:


  • Any gaps allow air to be drawn into the hood. The closer the fits, the more energy is available for cooking and heating. Once the stove is drawing (seconds) there appears to be no leakage, even from wider gaps. We didn’t use gaskets, but they can’t hurt.

  • We sized our male part to be 1/16in smaller than the female’s inside dimensions. Given our crude techniques, we managed between 3/32in and 1/8in. So long as it slides in without undue forcing and the gaps are small, it should work fine. Thermal expansion binding isn’t a problem as we only ever move it out once cool.

  • In both cases, the lips should overlap the opposite part to help close the gap and contain ash. Small tabs may optionally be bent along single edges to help minimize warping with heat.

  • Sizing can be more or less according to your available space. We sized around our frypan plus our small teapot, to cook and heat water at the same time.

  • The smokehead can be lower to the deck than is usual. Although it does induce some draft, Rocket Stove’s generate expansion in their combustion chamber, and actually push gas about 40ft. Still, an efficient draft smokehead hedges our bets in some gnarly conditions.

  • We didn’t have a brake (sheet metal bender), so clamped sheets over a piece of sharp-edged hardwood, then hammered it over. Cutting was with a thin-wheel grinder and touched up with a mill file. We used bent tabs with (copper/stainless) pop-rivets to join. Wear gloves, eye, ear protection and work safe!


Looking Ahead


One of the intriguing possibilities with Rocket Stoves is to make our own from a substance that insulates, absorbs and radiates thermal energy. In other words, which acts as a thermal mass or ‘sink’. Such are easily made from brick, firebrick, concrete, clay, cob and other materials. 


Perlite (pumice) is a light, inexpensive insulator, and can be mixed with concrete for a lightweight aggregate with decent thermal mass. The combustion chamber can be lined with refractory clay. A thick, steel cook surface is easy to install over a lipped smoke chamber for a full sized stovetop / smokehood. Sand makes a good gasket between plate and stove. Alas, this doesn’t sound very portable!


But we keep on thinkin’.


Friday, November 25, 2022

Foraging Ahead: Independence Along the Way

Our Go-to Guide

Good info; great pictures
We also use it to organize notes from other sources


Hunter-gathers by nature
Store information for use,
Understanding that there may be a time
When information is scarce.

― Brian C. O'Connor, Jud H. Copeland, Jodi L. Kearns


This sudden sweet loot appearing...

― Aspen Matis


Foraging Ahead: Independence Along the Way

Anke and I have been pursuing the know-how and means to stay out and away for longer and longer periods. At least to have the option. We've come a long way; still have a long way to go.

We recently spent half of a four month rowing / sailing trip experimenting with near hand-to-mouth forage. During this time we lived mostly from fish and wild plants. We took along our complementary rice / lentil mix (2:1 for complete protein), dried fruit and olive oil, using each very sparingly.

Result? We lost weight and felt great! 

We were hungry more often than we normally tolerate, but not to the point of discomfort, and were eating amply at mealtimes. We quickly learned to make up a 'salad' for the day (fish and berries mixed in)... this allowed us to snack as needed between two cooked meals a day. 

Of note, the 'super-carb' diet of vegetables, fish meat and oils, and fresh berries - the bulk of what we were eating - supported the heavy exertion of rowing up to 12 hours a day (well... mostly more like 6 to 8).

Meanwhile, we were cooking and heating with a rocket stove modified for indoor use. This let us gather wood every few days with ratcheting anvil loppers (quicker and easier than sawing), while drying it onboard as needed.

So we're pleased to find that our sloppy assemblage of skills has brought us near to the point that we could subsist indefinitely, if need be. 

*****

If we wish to venture away for any extended stretch of time - let's say months to years - from towns / resupply it helps to find werewithal along the way... shelter, water, food, fuel and materials.

Shelter is pretty easy, assuming we're sailors aboard our live-aboard vessels... they come with us as a matter of course. When necessary, shelter may be improvised from foraged materials (a big subject... maybe later?).

Water is nowadays only a little tougher. Offshore seawater desalinators are available in manual models and can be DIYed

'Longshore, especially in our rainforest, spring and groundwater flows provide plenty of fresh water, which can be easily filtered by compact, cheap and durable systems. These too can be DIYed with simple filtration systems, using home-made charcoal as the active principle. 

A plastic bottle filled with water and left in bright sun for a sufficient time will UV-sterilize its contents (SODIS: SOlar water DIStillation). Sadly, plastic bottles may be foraged along all the coasts of the world.

Food is foragable in hunter (fish, game, fowl) / gatherer mode. 

For sailors, fishing is the easiest, especially if you are willing to eat cod and other 'scrap' fish. I'll include other seafoods in this category, despite not being fish per se... crustaceans and molluscs  (grazing, single shell types are less prone to PSP (Paralytic Shellfish Poisoning) than bivalves).

Hunting and fowling are another deep subject I'll leave for another time. Consider salting, smoking, jerking and canning as longer term options for preservation without a freezer.

Most environments that are even marginally intact support a wealth of edible plants, and guides are generally available featuring local edibles and those to avoid.

Guerrilla gardens can help concentrate and enhance native plants, and add select, supplemental varieties. In our region, for instance, high-carb plants are few and far between... guerrilla potato patches are one way to add them. Alternatively, consider adopting a paleo-, neo-paleo- or neo-lithic diet... all three come much easier once you're out there.

NOTE: These diets are a little fuzzy. Generally speaking, paleo diet allows only wild grains (if at all), neopaleo diet adds early, cultivated grains, while neolithic adds 'modern' whole grains.

Plants can be dried (big weight and volume savings... just add water!), canned and fermented to preserve.

Fuel is used for heating, cooking and power (electrical and possibly propulsion).

Wood and other bio-fuels can be collected from land and shorelines along the way. 

We've had the most experience with wood, and supporting technologies are highly developed. A mild-steel stove or range, for instance, will work with driftwood, where cast iron will degrade. Rocket, gassifying and forced draft stoves are widely available, DIYable, and have the advantage of burning more efficiently and with less smoke. Less wood is necessary, and smaller pieces work well meaning reduced impact ashore, footprint aboard and gathering effort.

Materials are mostly wood in some form, and, nowadays, beach-combed trash. These can be used for repair, replacement and fabrication of new features.

Wood grows on trees, and spars of all sorts - masts, booms, battens, sprits - can be constructed with minimal shaping (especially when your vessel has been designed for tree shapes). Planks, knees and half-rounds (rails) take more effort, but can cover most any ship-board need. Wooden vessels take these materials in stride; resin based and composite vessels can be patched with them but may require further work once back in 'town'.

Beach combed garbage can often be repurposed to fill all sorts of needs. We're living in the neo-plasticene, after all. Planks, fasteners, containers, hoops, chafe gear, (PVC) springs, hose, valves, and so on can all be improvised from plastic garbage. There's an amazing assortment of metal this and that floating about, too, attached to wood or half sunk in sand. Repurposing rulz!

*****


Two additional aspects are key to all this; skills and tools.

Skills include the ability to identify, hunt / gather / process / preserve wild foods, tool use and maintenance. Is ingenuity a skill? Certainly of help! Ditto a sense of humor.

Tools run the gamut and are suited to your approach. Tools for mechanical, wood-working, wood-gathering and transport, fishing rods and reels, firearms, canning, drying, cooking and processing and maintenance are all possibilities to be tailored to your particular approach.

I lump into this category fasteners, wire, zip-ties and the what-have-you that lets you keep stuff from moving. Lubes to keep stuff moving. Consider generalist items that can be used flexibly in unexpected situations.

*****


The learning curves involved vary from low pitch to steep, and all are more or less life-long pursuits. That being said, the journey has rewards from the very first step, and the entire path is rich in satisfactions.

Foraged necessaries extend our time at large on the water, freed from return to the world of shopping and the cash economy with all its demands.

The reward is freedom!


PS. On our return, our first serious guerilla garden plot of potatoes had done well despite record heat early on, followed by exceptional wet! WooHOO!!

Sailing quietly, doing nothing, potatoes grow by themselves!


Spuds in Space!
Well... it's a Rocket Stove.


Sunday, March 17, 2019

Hot Toddy, Hot Schnotty: A Cure for What Ails Ya

Vinegar over Honey
plus spices,
before topping off with hot Water

I will use those dietary regimens which will benefit my patients according to my greatest ability and judgement...
-- From the Hippocratic Oath


Hot Toddy, Hot Schnotty: A Cure for What Ails Ya

By sheer coincidence, these two recipes came to us within a week of the other. The former is recreational, while the latter is medicinal. And without further ado...

Hot Toddy (from S/V VALIANT)
Whiskey (start with a finger or two?)
Apple Cider Vinegar (a splash, to begin with)
Squeeze some lime or lemon (or leave a twist)
Water (to top off)
Honey (to taste)
Salt around the rim (if that's how you roll)

All ingredients adjusted to taste/tolerance.

This one does for the recreational end of the spectrum. The whiskey is 'rotgut' (aka cheap)... no point mixing 80 year old Scotch with vinegar. The citrus can sometimes be found in your local, neighborhood dumpster, but we buy concentrate by the quart.


Hot Schnotty aka Fire Cider (amalgamated from the internet)
1 part Honey
1 part Apple Cider Vinegar
1 part Water (hot)
Heavy squirt of Hot Sauce
Pinch of CinnamonPinch of
Ginger
Pinch of
Tumeric
(if ya have it)
Twist of Lemon (if ya have it)

This one's medicinal. Blasts snotty nose, sore throat and eases a cough. Useful stuff when sailing into the social proximities of civilization. Serve warm or hot for best effect, taking a sip every so often. I don't recommend drinking it down! Listen to your stomach. I find it works best when gargled for a bit. It settles, so stir or shake it before use.

Interesting overlap between the two recipes. Their taste definitely has a family resemblance.
Both harken to our (great?)grandparents' use of vinegar and honey as home remedies.

Vinegar is acidic (generally 7% acetic acid), so should be taken in moderation. It has been used to treat or ease many external conditions, and is anti-fungicidal. Taken internally, it has been considered a blood tonic (my G'parents said it 'thinned' the blood) and, especially in the throat, an anti-bacterial and anti-fungal agent. But be aware that acid has internal effects on the teeth and stomach. A cup or so is a very potent emetic (makes us puke).

Honey is high in sugars with all their pros and cons. Local honies, especially, help prepare the body for pollens, reducing allergic reactions. In the throat, it can (like any sugar concentrate) discourage bacterial growth via osmotic action. On the other hand, once it's diluted (by saliva), it's food for growth. I personally let it sit thick for a bit, and then clear it out.

Cinnamon, Ginger, Tumeric and Peppers are all traditionally medicinal along with many others you can experiment with, and considered to be anti-bacterial and anti-fungal. Cayenne has even been mixed in with cheap bottom paint to up its anti-fouling properties!

Whatever the case, it sure seems to help!


*****

Bonus Yarn:

My Mom used to make us honey lemon teas for a cough suppressant.

One night, I had it bad, but didn't want to wake anyone up. I was six, after all... nearly a man.

I filled a pot with honey and brought it to a boil, then added a squirt of lemon. I carefully decanted the mix into a mug.

Then burned the bejeezus out of my lips, waking all in the house with my wails. I suppose it could have gone so much worse.

An early lesson in the importance of proportion and expert advice!


Monday, April 2, 2018

(Almost) DIY 'Spun' Honey

DIY Spun Honey
Photo with recipe by hardlikearmour


"Well," said Pooh, "what I like best," and then he had to stop and think. Because although Eating Honeywas a very good thing to do, there was a moment just before you began to eat it which was better than when you were, but he didn't know what it was called.
― A.A. Milne, Winnie-the-Pooh.

(Almost) DIY 'Spun' Honey

I've always had a yen for 'spun' honey (aka whipped, creamed, churned, set and fondant honey).

Spun honey tastes just like regular, but behaves much better. It is generally much more viscous than liquid honey, so is much less prone to drip and run all over the place. This DIY version is even better behaved!

I was lauding spun honey's virtues to a cruising couple of friends, while lamenting its higher cost. They had a solution!

Turns out the 'spin' in spun honey serves to mechanically break down large crystals as they form. It may even be a structurally alternative crystal to that pesky kind that turns it into a gloopy glop of sugary chunks. This alternative crystal is smaller, and therefore uniform and much finer.

My friends take a wide mouth container and fill it with liquid honey, then seed it with a spoonful of spun honey (commercial, or from your last batch). Holding at about  57degF (14degC), stir every few days for about a week, until it has thickened to a lugubrious, uniform paste. Cap and use!

In many cases, we'll start by heating liquid honey in a double boiler to quite hot to remove all crystals of any kind, then cool it until it's warm (not hot) to the touch before adding seed. Too hot and you'll break down your seed crystal. Once converted, store in a cool place to keep it firm.

The result is a docile spreading honey that stays put.


Guilty Pleasure

Since I was a kid, I loved spooning honey and peanut butter. Powerful energy kicker for a cold day at the helm.

DIY spun honey is perfect for this... take a quarter dip of honey on a spoon, then a full dip of peanut butter.

Pop it in your mouth and bliss out!


Sunday, December 4, 2016

Q&D Shelves


Wish I had a pretty little girl, 
I'd put her on a shelf, 
Every time she'd wink her eye 
I'd climb up there myself.
 -- Old Joe Clark


Quick and Dirty Shelves

Boats can have a lot of shelves in them, often in odd spaces. Over time, we worked out a formula that  lets us zip 'em out without a lot of head-scratching.

Basic idea is that a (plywood) shelf between walls (dividers, bulkheads, what-have-you) has a support rail attached along its lower, far edge, and a fiddle/support rail attached along its upper, near edge and overlapping the Cleats. 

Cleats are attached to the vertical walls at either end, with room for the support piece to slip behind with a little wiggle room. This locks the shelf against horizontal movement (may need screws if you anticipate tossing them vertically!).

Advantages include:

  • Quick, standardized construction
  • Easy installation and removal (for cleaning, painting, etc.)
  • Flexibility (can be adapted for size, loads, clearances)
  • Uses up a lot of smaller plywood offcuts
  • Relatively easy to go back and rework spacing, if desired (just move cleats)

If you wish to get a bit fancier, the fiddle can be rabbeted along its underside to cover the raw edge of the shelving material.

You can angle the far end of the cleats to a point... this allows the shelf to be lifted upward as if it were a lid, rotating around its far edge in contact with the points, until the support face fetches up against the angled cleat end (the sharper the angle, the higher you can lift the shelf). This can be useful in tight spaces where you need a little extra room to un/load the space below it. For example, a tote that fits snugly may need a little extra to clear fiddles and such along its near, lower edge.

We found that our locker openings don't let us insert full length shelves. We ended up cutting this type in two, mid-length, and putting a lip under one of them along the cut. A short, rabbeted piece is attached to the back wall, rabbet up, straddling the cut (also with a little wiggle room). The lipped side needs some support at the near, cut corner... we use twine attached to the next fixed point above it, rather than build struts. This approach has been much easier than installing a divider, and doesn't break the run of shelf length.

An idea to shelve away!


*****

Bonus Tip:

Can't recall where I read of this, but could well be The Sailor's Sketchbook by Bruce Bingham, under 'removable fiddles'.

Another simple locking device is to make pegs that fit into matching holes. These can be made of wood or metal.

One cool way to do it is to drive a (bronze) screw in the peg location, burying the threads but leaving the shoulder exposed. Hacksaw the head off and smooth with a metal file to leave a protruding peg. Put the piece (shelf, removable fiddle, table, etc.) in place, over its supporting surface and tap over the screw with a hammer, denting the receiving surface with the exposed peg. Drill a (slightly loose) hole at that spot. If everything is done reasonably square, the peg slips into its hole, forming a sheer lock, preventing horizontal movement.


 Bonus, Bonus Tip:

A recent brainstorm is to use heat to flatten and shape PVC to form springs. A hole drilled through the PVC to match a peg forms a lock that can be released (sprung off the peg) with gentle pressure.

Works for door latches, removable step locks, drop down bin locks, hatch locks... spring shapes  and applications are limited only by the imagination!.

You can find lots of info on shaping PVC through sources like this one, drawn from the way-too-cool world of PVC bow-making.

Wednesday, October 12, 2016

Can Stoves Can Do

By Gary Larson

When you light a fire, you commit an act of magic...
What thrilling enchantment, 
What cunning sorcery, 
Has the work of your hands created?
-- Anthony Murphy


Can Stoves Can Do

Anke and I spent many a pleasant summer evening, this year, watching the sun go down in the company of a (tin) can stove. A hot meal and spruce tea with the smell of woodsmoke on the air...

Cans are amazing resources.They're to be found anywhere and everywhere. They can be bought brand new with a bonus load of... let's say olives. Recycling centers have dumpster loads of them in a variety of shapes and sizes. Paint cans and buckets can be bought new and empty. For the improvised galley, they can easily be worked into pots, pans, mugs, bowls...

And stoves! Biomass fueled stoves that last long enough to pay handsomely for the effort invested. Biomass itself is inexpensive and nearly ubiquitous... wood, weed, manure and peat. With a fire-proof base (e.g., a gravel box), they can be used aboard a boat of most any size.

Can stoves cost next to nothing, contain and enhance the efficiency of an open fire and are scalable to most any need. They're made from various combinations of cans, including those for canned foods, paint cans and buckets or even stove-pipe, various pots or ammo cans.

A 55gal oil barrel, anyone?

Can stoves do burn out in a season or so of use. While a can-opener, nail and rock are all the tools necessary, I recommend investing in a good set of tools - tin snips, pliers, drill and step bit, awl, file(s) - that let one replace as necessary. Each replacement is an opportunity to experiment with a new design or refine an old one.

Here, I'll present three types made from steel ('tin') cans (Hobo, Rocket and Gasifier stoves), and two made from aluminum 'soda' cans (Wick and Penny stoves).

These featured are starting point for the pyromaniacally mad scientist. Can proportions; hole sizes, placement and frequencies; cutouts; airflow channels; open top/bottom designs, pot/pan supports, handling... all afford plenty to dink with. It's a vast world of possibility with lots of info on the net. Here is a visual sampling.

Or you can simply copy a proven design. It's hard to go too far wrong.

Remember, cut cans are sharp and can generate nasty cuts. Wear gloves and eye protection when building stoves. Smooth the edges as well as practical, and stay alert when using. Also, fire is inherently dangerous. Use all precautions, including having extinguisher technology at hand while using.

Let the Flames begin!

*****


Full article at RemoveAndReplace.com

Hobo Stove

This is the simplest type, extensively field-tested during the Great Depression. They're not terribly efficient (though much more so than an open fire), and produce a fair amount of smoke. Be sure to breath as little of that as possible!

At minimum, it's a top-loading can with lots of air holes. Refinements limit and focus hole spacing, add fueling ports and pot/pan support. The one shown above is a decent model.

If the top is left intact (unopened end of a can positioned UP) it can be used as a cooking surface. But heat isn't easy to control, and I'd consider that a fall-back option.

*****


Full article here.


Rocket Stove

These are a big improvement in efficiency over Hobo Stoves.

They work by setting up a powerful draft blowing through a sharp-angled, insulated burn chamber. Oxygen is abundant and well mixed with combustion gasses at higher-than-normal temperatures for an efficient, low smoke burn. The roar of their draw gives them their name.

All sorts of non-combustible materials can be used for insulation, but the more air space is trapped, the better the insulation will be. The less its thermal mass, the sooner your chamber will reach its maximum temperature.
SQUARE BOAT NOTE: If, like me, don't like fitting curves to curves, combustion chamber/chimney designs can be adapted to cans that have been squared after cutting off their ends. They will meet at 45deg.

 *****

Full article at The-Knowledge.org
  
Gasifier Stoves

These are another set of efficient designs which first pyrolize their  fuel (i.e., using primary combustion heat to drive off combustible gases from the fuel and carbonize the remains) and then burn the gasses. This principle has been used to fire internal combustion engines for transport and electrical power production.

The link given above is for a simple model, used in a simple mode. Very similar alternatives include TLUD (Top-Lit UpDraft) Stoves. Despite their resemblance,  these work on a different principle. This one features a more precise build with high-end tips you may wish to apply to other stoves.


****

Aluminum can stoves burn alcohol, rather than biomass. They can be considerably more sophisticated (and finnicky) than those listed above. I've heard they don't work as well in very cold weather. But they are the last word in ultra-light stoves.

Here's a general principles article to get you started.


Can't find who drew this up... How-to article here.

Wick Stove (aka Soda Can Stove)

These work by saturating the wick with alcohol. It evaporates, and the gasses are burned. Some models feature a lid to snuff the flame and preserve fuel for later, others merely let the fuel load burn out.

Here's a variation that's a bit simpler to build, with some cool accessories.

*****


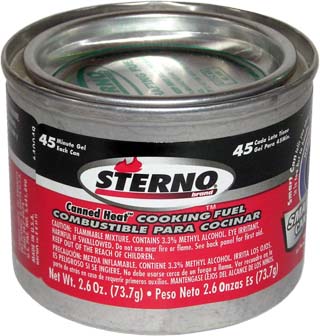
Zen Gelled Alcohol Stoves - Sterno-like Stoves

Gelled alcohol commercial product

Gelled Alcohol

Gelled alcohol is primarily used for chaffing dishes (serving dishes kept warm by the flame), but they're great for camping and micro-cruising. Stands are cheap, and easy to DIY (can even use a can... do the Can-Can!).

BTUs are somewhat low by volume, so they're slower. Many are methanol based for higher BTU. Methanol is poisonous, so don't cook directly over the flame, but use a pot (AND extra-good ventilation!).

The gel is nearly spill-proof, and better, can be made DIY. Best of all, the ingredients (shells, vinegar, alcohol) can all be DIYed in the field, making this a long-range option. Larger surface areas (bigger diameter cans) can help overcome lower BTUs/sq.in.. 

Check out this article for a recipe. 


*****


Can't find who drew this, either... Inventor's home page, here.


Penny Stove

This one uses a penny's weight  to regulate fuel flow rate. The how is simple but the why complicated.

When all is in good proportion, their flame jets are a thing of beauty. They're considered by many hikers to be the ultimate in ultra-light heat.

*****


There's something about an open fire. Something deep in the blood as we stare into the eyes of our companion of a thousand generations. Our worst enemy, it is said, and our best friend.

But something, too, in fire contained. Focused. Intensified.

We are apprentices of fire's alchemical magic. We seek its ways. Learn to feed it while avoiding its bite. Learning to excite its passions without being consumed by them.

Together transforming dull matter into heat and light.

Monday, December 1, 2014

Spawned Out Fruit: Some Recipes for Wine Musts

Must find a way to use the must!
Photo from enofylzwineblog.com


Some very fine fruits died in the making of this wine. Show some respect!
-- Gleaned from the Internet


Spawned Out Fruit: Some Recipes for Wine Musts

Boat Wine generates a fair heap of must; slightly used fruit of dubious appearance... Anke dubbed it 'spawned out fruit'.

It looks a little worse for wear... smooshed, and a bit ragged around the edges. Texture is on the firm side of  'stewed' (especially with liquids drained or pressed out). Little sweetness remains after yeast has had its way.

On the plus side it's chock full of B vitamins from yeast content, as well as fiber, vitamins and minerals from the fruit itself. Much of its original flavor remains, accompanied by a distinctive, alcoholish flavor.

If you're out and away, you work for a living or even try to live mindfully, throwing out this perfectly good food seems wanton waste!

Without restoring the sugar, the fruit can be added to savory dishes. Stir fries, pastas, salads, cassaroles. It goes especially well with meats in the manner of chutneys, along with perhaps a bite of vinegar. Or added to pot roasts and other slow-cooked meals.

Sweetening is a simple matter of adding sugar to taste, after which you can add it to oatmeal, pancakes, cinnamon rolls and the like. Or adapt your favorite recipes for pie, cobbler, strudel and cakes - upside up or down. Or...


In short, you can add it to most anything, playing with possibilities and refining results. You can supplement flavors which all work in the same direction, or experiment with piquant contrasts that titillate the tongue. Plain Jane or Cordon Bleu.

Due to its appearance and a general aversion to 'left-overs', must dishes can encounter an initial lack of enthusiastic reception. But a little creative 'dress up' enhances presentation, making use of its colors and textures.

While it's unique taste is sometimes an acquired one for those raised in Puritan cuisine, we find that, if our friends can get past that first bite, we've usually made a convert!

Bon apetit!


PS. I'm pretty sure the alcohol bakes out of cooked must, but the taste remains. Consider that some of our friends are recovering alcoholics, for whom a bite can range from uncomfortable to downright dangerous. Others may wish to avoid alcohol for religious or personal reasons. This isn't an ingredient to spring on the unsuspecting!

*****

Here are two less common recipes to whet your appetite:


Mazurkas
These are essentially a three layer fruit bar. Thickness and texture of the three vary widely, depending on taste, and how you adapt proportions. The crumble (dough) texture can be varied by a little more or less oil, adding small amounts of water, milk or other liquids. The fruit mix can vary from jam-like to almost chewy, depending on how much thickener is added. Can be gussied up with spices, nuts, chocolate, etc. to taste. 
Combine 1 part each of flour, sugar and rolled oats with 1/2 part oil (minced butter is mighty tasty and works best but it's seldom available to us, so we use liquid oil). Comes out somewhat crumbly. Consider more or less oil, to taste.

In a cake pan or equivalent, spread half this mixture. Press to preferred depth.

Start with fruit in a separate bowl (about 1/2 the volume of the other stuff)  and sweeten to taste.  Add a thickener (cornstarch or flour) as you would for pie filling. Spread evenly over layer in pan, to preferred depth.

Spread the rest of the dry mixture (if you wish to add water, do it while still in bowl).

Bake at 350degF/175degC for 25 minutes, or until golden brown. Let cool before cutting into bars. Often at its best after a day in a cool (not cold) spot.

NOTE: Our 4g batches of wine use enough must to fit with 1c (~250cc) portions, and fit into a 9x13in (~25x35cm) baking pan.


 Fruit Kim Chi
Kim Chi is ordinarily a fermentation of vegetables with spices. In this variation, it's a second fermentation of fruit with spices (one suite we like is chili peppers, garlic and ginger).
Anaerobic fermentation and salt inhibit yeasts and molds, but permits lactobacilli to produce that 'sour' taste we associate with kraut and pickles. Find precise guidelines here, and free and easy guidelines here.
In a glass container, layer a glop or two of fruit, dried or fresh spices, and (non-iodized) table salt at the rate of one heaping teaspoon per pint (10 grams per half liter). May adjust salt up or down, but I suggest researching the whys and wherefores at the links, above..

Top with a bioplug of any edible, leafy vegetable. This is a sacrificial lamb which
may float, but helps to keep the fruit submerged. Periodically pushing it into the brine should keep it mold free, but if not, exchange it for fresh, carefully wiping any mold from edges of glass.

Add liquid (water, generally, but consider wine or vinegar), with maybe a proportional dash of salt.

Cover with a clean cloth and let sit at room temperature. Bubbling will come and eventually go. Sample occasionally, and use when delicious!

NOTE: You can always add more salt, if not enough (chronically moldy bioplugs), or dilute it if too much (no fermentation or unpleasantly strong taste of salt). If you want extra salty (for garnish, say), you can add it after fermentation or at serving time.


Saturday, April 12, 2014

Lehman's Non-Electric Catalog: A Review

Dietz Lantern / Cooker

We're a strong handshake and a helping hand.
- From Lehman's Who We Are


Lehman's Non-Electric Catalog: A Review

You might think that the Amish are among the land lubbinest group of folk to be found anywhere, not to mention land-locked Kidron, Ohio and its environs. And you might be right.

But we Water Rats have a lot in common with them. Or, at least, a lot to learn from them.

The Amish are an enduring community who values simplicity, appropriate technology, independence, DIY, and one another... all themes near and dear to my heart.

More than most, they walk the walk.

So, Lehman's... a company who was originally created to serve Amish customers' interest in manual tools - for carpentry, the kitchen, the garden, for livin' -  but who has found a wider market. In their words:
Since 1955, we've offered simple products that simply work.
  • We value locally made products
  • We honor the past and respect tradition
  • We sell low-tech items in a high-tech world
  • We carry what others don't
  • We stock non-electrical products that are dependable and reliable

Their prices tend to be somewhat on the high side, for any given item, but they are a single point source for a wide range of hard-to-find items. Between energy dissipated in shopping around and multiple shipping and handling charges, the difference is handily overcome.

Anke and I aren't exactly repeat customers. Why? 'Cuz nothing we've bought from them has worn out in a quarter century of hard use. 

Need I say more?


Sunday, January 19, 2014

Diet for a Small Boat

Complimentarity for Complete Proteins
See Diet for a Small Planet by FM Lappe


We're not just what we eat, we're how we eat.


Diet for a Small Boat

Okay, not so much a diet as a handful of strategies for feeding oneself on a shoestring.

A lot of the info available for self-sufficiency focuses on land-based homesteads. Horti- and agriculture, often coupled with animal husbandry techniques don't translate as well to seasteading. 

Our distinguishing characteristic, as cruisers, is our mobility. We're not tied to any particular piece of land, but have access to a range of resources. We want, therefore, strategies that allow us to feed along the way. We want to avoid, or at least minimize those which tie us to a particular time, place or economy.

The following are a number of strategies that we're doing, dabbled in, or hope to try. Like most things in our life, it's a work in progress. You'll note that some are diametrically opposed to others. What they have in common is the promise of easing us out of the consumer economy, and toward a more subsistant lifestyle.


Guiding Philosophies

  • Nomadics -- Gotta eat and run!
  • Wildivoracious -- Eat wild, when possible.
  • Locovoracious -- Eat local, when possible.
  • Opportunivoracious -- Eat what presents itself.
  • Omnivoracious -- Broaden the palette.
  • Neo-Primitivism -- Do what can be done by hand.


Approaches

  • Neo-Primitive aka Paleolithic Diet -- Fewer, high-quality carbohydrates and more proteins.
  • Vegetarian -- Potentially more energy efficient by orders of magnitude.
  • Vegan -- See New Age of Sail by Dmitry Orlov.
  • Raw Foods -- As adherents ask, "What's so different about humans, among all other animals on earth, that we require cooked food?"


Food Sources

  • Gathering (Wild)
  • Gleaning (Fringe)
  • Fish, Game and Others
  • Guerrilla Gardening
  • On-Board Gardening
  • Barter -- Includes barter for 'money'.

Enhancement

  • Fermentation -- See Wild Fermentation by SE Katz.
  • Protein Complimentarity -- 2 part grains : 1 part legumes (and other combos).
  • Sprouting


Preservation

  • Drying -- For the weight-conscious cruiser!
  • Pickling
  • Brining
  • Smoking
  • Canning


Fuel

  • Biomass -- Wood, peat, etc..
  • Biofuels -- Let's say, liquid fuels processed from biomass.
  • Solar -- The gift that keeps giving.


*****

We've tried all of these, and most of them have become staple approaches. 

They're easy, fun and tasty. Each of them takes us one step further afield, lets us stay out longer, and reduces our dependency on the monetary economy. They help tie us into local networks of gardeners, fisherfolk, home cooks and friends at large.

Food is something we all need and love...

Why not make the most of it?


Wednesday, August 21, 2013

Inner Space: Some Thoughts on Interior Design


The Church says: The body is a sin.
Science says: The body is a machine.
Advertising says: The body is a business.
The Body says: I am a fiesta!

Eduardo Galeano


Inner Space: Some Thoughts on Interior Design

Ergonomics is the art and science of fitting things to the human body. Tools, toys and the spaces we inhabit.

The science bit revolves around the facts of the human frame. About yeah tall; so wide; jointed here and there; bends this way, not that way.

Bunk lengths, seat and counter width, heights, depths and overhangs, lumbar curves (to backrests), headrooms – standing, seated or kneeling – all have generated more or less standard numbers, averaging human norms. Consider, however that plenty of folks don’t fit those norms, AND the norms change over time (we’re getting taller and wider!).

You can read this book  or visit this thread for more info, but the best way to get the numbers is to measure furnishings and spaces that you and yours find comfortable, then mock them up to work out the deets.

The art is harder to grasp. This is subjective, and a matter of abstracting the principles behind the kind of spaces that make you feel the way you wish to feel.
Art is complicated by compromise with other considerations. Love that rustic, raw wood look? Hard to clean. Stucco? Ditto. Porous surfaces can become mildew havens. Natural fibers go musty. Some of us prefer center cockpits dividing off a private, aft cabin… which must be heated, complicates steering arrangements and may require a dash through weather to reach head or galley. We all walk a line, balancing our tastes against the limits to how far we’d go to indulge them.

Here are some of the things I like and tend toward:

Contiguous, Open Space -- I personally like an open, expansive feel to my home environment.

Physical space allowances (legroom, elbow room, etc.) that don’t have one person violating the ‘personal space’ of the other call for long, hard thought. Seating should be amply wide, to accept however many persons sitting side-by-side. Opposed seats should be sufficiently far apart that footsie is voluntary. ‘Course, when I say should I mean do what you can.

Airspace (from the waist up) is important to me, and can offset a certain degree of physical constriction. To avoid that walls-closing-in feeling that many interiors produce, I avoid incursions and cut openings in barriers (such as bulkheads). Privacy can always be reestablished, if necessary, by curtains or other removable means.

Windows open the interior into the wider world and pierce the close embrace of the hull. I avoid center- or daggerboard trunks, which can divide the cabin spaces longitudinally. Likewise, I prefer not to have masts pierce the cabin spaces (split, cat rigs are arranged at the cabin ends). I like big cutouts in bulkheads, creating social spaces that join galley, salon and bunk areas. I tend to avoid enclosed spaces (head, pantry, wet locker, etc.) which break up the contiguous, open areas. If such things are included, they huddle at the extreme ends.

Galley at the Heart – A well fed crew is happy, warm, energetic and good to go. When guests are aboard, who wants to choose between cooking and visiting? The Galley, I believe, is best located between Cockpit and Salon (seating area), with good lines of sight between them. Handy to the cockpit for a mug-up; part of the party below-decks. We heat and cook with wood… a large cut-out in the Galley/Salon bulkhead permits radiant heat from the stove and further opens the space.

Pleasures of the Bunk – The Bunk isn’t just a hole to crawl into and collapse. It can extend the lounging/social space, and is often the scene of extended bouts of reading. It should be well ventilated, light, comfortable and airy as any other. It’s often a hotbed of sexuality… will it accommodate your passions or cramp your style? Can it be curtained off for privacy, when necessary? Does it have adequate and handy storage for clothing and personals? Can you sit up at night and check your anchor bearings without leaving covers’ warmth? Can you tumble out on short notice when the fewmets hit the windmill?

The Head, et al – Hmm. I’m a fan of Hereschoff’s cedar bucket – practical, compact, sanitary. But I acknowledge that the intimacy involved is not for everyone, and that at least token privacy is often preferred.

Okay. Our compromise (to be tried out in a future boat) is a semi-enclosed space in one corner of the galley. A section of counter spans the space when not in use, then flips up to join a partial bulkhead to wall off the forward face. A curtain may be drawn across the longitudinal opening for full privacy. Meanwhile, the outboard wall (outboard of the flip-up counter edge) accepts deck- and raingear, doubling as a wet-locker. This maintains good counter space, view from Galley windows and doesn’t crowd the airspace when not in use.

Multiple Function – It’s often possible to design components for multiple use, whether separately or together. A counter may double as workbench. Dinettes and setees may be made down into bunks.

A trick we used in LUNA (and will repeat in the next boat) was to make the adjacent Salon seat and Bunk heights at one level. With the dinette made down, a Salon soleboard could be raised to seat height, spanning the gangway and creating a large, level, workspace.

There is a caveat… we can get too clever for our own good! Finnicky transformations, or rickety results; a single contraption for simultaneous necessities; accommodating trivial or unnecessary functions… all of these can lead to frustration and clutter. Keep it Simple, Sailor!
So here’s a look at one of our preferred layouts, incorporating these ideas:


And here's how LUNA's interior looked:


View Aft from Salon to Galley

 
View Fwd from Salon to Bunk


*****

Interiors are very personal things. Your design will, at best, accommodate the way you live – your needs, patterns, tastes and social dynamics.They seldom can be considered to be entirely finished. Like us, they evolve over time. 

But a well considered start provides a solid foundation for a happy life aboard.