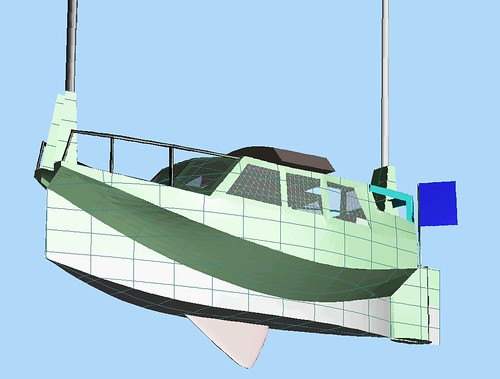
Please visit our home site at www.TRILOBOATS.com.

Anke and I live aboard WAYWARD, and wrote about it's design and construction at ABargeInTheMaking.blogspot.com.

Access to the net comes and goes, so I'll be writing in fits and spurts.Please feel free to browse the archives, leave comments where you will and write... I'll respond as I can.

Fair winds!

Dave and Anke
triloboats swirly gmail daughter com

Showing posts with label TriloBoats. Show all posts

Monday, July 20, 2026

LUTRA Launched!


Floating high!

LUTRA - Genus name of river and sea otters of the family Mustelidae.


LUTRA Launched!

You'd think it would be getting easier with experience. Not sure it's gotten any harder, but it takes longer than we think and leaves us elated, but whupped each time.

Building one's own vessel - DIY - is a mixed bag. 

On the one hand, it's a long sequence of tasks presenting varying degrees of challenge. Learning curves, supply chain foibles and material quirks, domestic and social duties and distractions... even - or especially - weather all conspire to prolong the ordeal.

On the other, we get exactly what we've dreamed and crafted into being, with a tailored fit no production vessel can match, and the care and attention no professional can afford.

A dream, a plan, a few tools, a pile of materials, skills acquired along the way, and stubborn persistence are all that are required.

And time. LUTRA has about 4 months of work in her for the two of us amateurs. Extend to about 6 1/2 months accounting for the copper plate - including stripping it off WAYWARD and some wasted time learning to translate 2D angle to 3D. Extend to 21 months accounting for all those detours I mentioned on the one hand.

We took a bit longer than necessary to launch her. Each boat is different, and when possible, we like to launch her by ourselves using tools we carry and materials that can be found anywhere in our cruising grounds. This time, we were mostly successful on both counts, but kind friends had to be dissuaded from lending their time and heavy machinery. We look kinda Luddite to most, but we have to be able to handle a potential move out there, and on our own. So we grunted and groaned our way to the water in only three days.

There's work left to go.

We'll spend the next month finishing out the interior, building a rocket stove and moving aboard. Then off to find spars a few miles from Tenakee. Then a few more miles to rig her. But it's now on our own time, and afloat.

The archipelago awaits!


First kiss o' the Sea


Tender time
Photo by Beret Barnes


Towed by Friends
Photo by Darcie Ziel


Monday, April 13, 2026

Guest Post: MARY H by Chris George


MARY H
All photos supplied by Chris George


Lord, it was day and night and night an day work when in season!

- Some Old Salt


MARY H
  Guest Post by Chris George

In 2022 Massachusetts announced a small business grant for Green Innovation and Climate Resiliency in the commercial seafood sector. I won the grant and built a scow for my shellfish farm. Having read the Triloboat Blog for years, I had formed the idea that a sailing scow could be useful. The book Trade Winds by Christiaan de Beukelaer implanted the idea of using sail, and maybe electric, to power my work on the farm for climate reasons. The idea was born and I received $25,000 to build and work the boat. She is named the MARY H, after my wife, and her mission is to carry and deploy aquaculture gear and pick up oyster and quahog seed and drop off harvests to a hatchery facility about one mile away across part of Cape Cod Bay.

The design already existed in Howard I. Chapelle’s classic American Small Sailing Craft as the Cape Cod Bay Pound-Net Scow. In the old sailing days, these boats mainly fished herring - and fished the species out! They look like the TRILOBOAT StudyPLAN SANDBOX, but evolved slightly curved sheer lines helping with the “roll to the sea, as there often is on the Cape shore” and historically carried a pile driver. I sent to the office of ship plans at the Smithsonian and for $60 they sent me a tube full of diagrams of old scows -including Great Lakes types - along with Chapelle’s lines, taken off in Provincetown in the 1940s. To start I had Dave’s blog, Chapelle’s book and an awesome picture I found on the internet of a model built locally off the same plan, credit Rob Napier. 

The original boat in the plan is 36’ and I determined for the scope of the project, and town mooring regulations, to scale the build to 20’ - though I did wonder if proportions would get weird later on. So off this poster-sized plan I made a table in my notebook with an engineering ruler and scaled all the points of measurement for 20’. I also set about making an 8’ mock up with a couple scrap veneer plywood sheets and a cardboard model. Making the model was fun just tracing the plan onto cardboard and adding a chopstick mast and paper sails; at that size my old G.I. Joes look like a person of 5’4’’ height. 

To build the boat I had written some pay into the funding to hire skilled help. I hired a friend of mine, a retired roofer and now bricolage artist with whom I had already worked on a few building projects. The first thing we did was to locate a tree for the mast and let it cure for about a year. It’s a beautiful mast! We found a very straight white pine of about 24’ in the woods on a neighbor’s property. Stripped it with a machete (held like a spoke shave) and then coated it with wood preservative and hung it in my garage. 

Severely squeezed into my garage, the actual assembly and building went straight down the lines of “Instant Boats.” Dynamite Payson virtually dictated the techniques that I would modify. Cutting out the main pieces from plywood was most of the early work. I referred to the notebook table a lot and because the math was simpler to convert inches in decimal (remember the engineering ruler), I made sure to make an extra column for the conversion back to 1/16th inches for my measurements on plywood, transcribing the height of the sheer above bottom. The one caveat is that this measurement required another column in the table because the Pythagorean theorem had to be applied to account for the flare of the hull as the Chapelle plan just shows a profile view. No lofting though! A Kreg brand T-square was used constantly. I made a useful misstep while building the mockup that helped me realize to account for flare because I paid a printer to just proportionally enlarge the plan and I used it like a template. When assembling the mockup (which I may still employ as a standup paddleboard) using stitch and glue with zip ties, it felt scrunched down. This effect was not noticeable at the tiny size of the model. The actual cross section of MARY H is 5’ across the bottom with a 5’6’’ beam on deck. 


The winter months were spent in the garage with a space heater cutting and edge joining the plywood with epoxy and fiberglass. The gunwales were constructed in this way as well as five transverse bulkheads for holding the structure together like a ladder. Striking the fair curve of the bow and stern were the most ancient and nautical feeling part of the process. It was accomplished by laying the measurements on the plywood with nails and bending a piece of PVC edging around them. The curve was hand cut by eye with a buzz saw through the skill of my roofer friend. 


Building a boat was a lot to ask of my family, three children and one an infant. I did a lot of work after bedtime into the night and tried to involve the children as much as possible. One problem spot occurred while attaching the bottom to the sides for tape and glue. We decided to attach the bottom with the boat upright, bending the kerfed bow and stern up with shims and two-by-fours at both ends. The shape of the boat would be held in place for gluing with bar clamps and screws edgewise above the waterline. The deadflat was easy enough and all joints were bonded with epoxy fillets and fiberglass strips. But the ends had to be done in one fell swoop laboriously levering up the ends of the boat like flaps over the piles of shims while running around to make everything even as sealant set between the seams. We went way over time and things were starting to fail as my wife pulled in with all the kids. Seeing them all it was such a sacrifice not to be able to care for my baby at that time. But I left it in the care of my friend and somehow he finished the bottom single handedly. 

With the hull still upright I built the centerboard box up out of clear pine boards and more marine plywood, splurging on bronze screws. Now looking boatlike, I got a group of friends together to help flip the hull over onto its transoms for sheathing the bottom. All were promised fresh clams or oysters. I sheathed the entire hull on the outside only with one layer of thick fiberglass cloth bedded in epoxy. Once painted the same crew helped me flip the boat again onto a trailer which I picked up reasonably from the USACOE via the GSA, a good resource. The garage doors were popped off the hinges and the boat was carried out by hand. I had lined the trailer with an old foam mattress that I saved for this purpose so she would have a soft landing onto the rollers. 


Outside in the Spring I built deck stringers out of clear pine strapping and built the mast step of extra fir from the skeg. The boat was filled with 100 empty soda bottles for buoyancy with some sealed plastic water cooler carboys for good measure. The deck was cut from the same ½’’ marine plywood as the rest of the boat and laid as efficiently as I could manage. Between every seam I shot marine sealant or sometimes silicone caulk. A somewhat big mistake was not better sheathing the deck somehow because it leaks during rains. It has to be pumped out after rain and storms now while on the mooring. The hull is tight however so the water inside is “fresh.” One splurge was for EVA foam faux wood decking. Rolls of this stuff were moderately expensive but are a big facet of the historical look, and napably soft. Many people have stopped by the boat and remarked they thought these were actual planks. Rub rails are made of super cheap highly sacrificial lengths of furring strip.


Rigging is piecemeal. I got about 100’ each of tan synthetic rope for the halyards and great thick faux hemp nylon rope for the main sheet, also a historical touch. I made a forestay with hardware store steel wire and shackles. Chafing gear is cut garden hose. The sail was made at a sailmaker in Falmouth, Massachusetts. The proportions are kind of weird as the boom is a real deck sweeper. It will help to reef when I sail the boat more in earnest. At this point she sailed down wind, in the lightest winds three times in the Summer and Fall of 2025. Yet, when I put the sail up, down wind, in the lightest wind, it is still hard to deny we are under sail. And that feels great! I am looking at a potentially life long learning curve so there is plenty of time to perfect it. For electric propulsion she hangs two five horsepower German Torqeedo engines off the stern with some Chinese ePropulsion stick engines for backup.

MARY H now sits on the hard waiting for the 2026 season coming up at the end of March. All the people who helped were essential: a landowner letting us search for the mast, friends and relatives who flipped the boat or shot screws or gave friendly advice, authors - I owe them all a ride or at least some oysters. Spiritually, there have been few journeys as rewarding for me as building this boat. At the Christening, the bottle was smashed by the real Mary H.


Expenses

Dave, here. Chris provided his cost accounting under the grant in response to requests in the comment section. His itemized list can be read HERE. Please click on the spreadsheet image for a more legible pop-up.


Monday, October 20, 2025

LUTRA Update: Building Blues and Bloom


A Work in Progress


Rome wasn't built in a day.

-- Old saying


LUTRA Update: Building Blues and Bloom

There are two things I yammer on about:

  1. Small is beautiful.  - E.F. Schumacher
  2. Curves and angles add to building time and effort.  - Me
Yeesh. I should listen to myself.

We're just rounding the one year mark on what we'd estimated to be a four month project. Six months if the stars mis-aligned.

A winter build - now approaching another? -  interrupted work with deep-freezing spells and general hypothermia, leaving us staring stupidly at simple tasks. Weather - exceptionally cool/cold and wet stretched from that winter, through spring to latish July, bringing mildew in its train. A series of guests (whom we thoroughly enjoyed) brought a warm spell that ended promptly with their last departure. Back to hypothermia. Our short-handed community has needs with few to step up. Our own life has chores that can't be indefinitely deferred.

It adds up to a blues riff.

But one step in front of the other. The structure is complete and we're building and tacking on gear (hatches, tabernacles, bow rollers, cleats, rails, rudder/tiller, etc.). In a week or two - barring further issues - we'll start the simple interior, then windows, then launch. we're hoping for 2025.

So we persist. We dream of returning to life at large among the islands.

We bloom.


*****

It's a challenge taking photos from point blank!


Rowing Cockpit from Forward
Longitudinal Seat/Lockers between Self-Bailing Decks
Main Tabernacle at Main Bulkhead


Rowing Cockpit from aft
Longitudinal seat lockers to Leanbank/Fo'c'stle Hatch
Fore and Main Tabernacles visible


Tuesday, September 9, 2025

Tulle + TBIII + Paint: A Promising Sheathing Combo


Save that Veil...
It's Tulle!

Because, in your dreams, every detail matters.

- Wedding Veil Ad Copy


Tulle + TBIII + Paint: A Promising Sheathing Combo

In our endless search for cheaper solutions to common problems, we seem to be closing in on a minimum. Specifically, in regards to a plywood sheathing system.

Previous posts - More Than One Way to Sheath a Boat and Deck Sheathing: Alternatives to Fiberglass and Plastic Resins - explored alternatives we've tried. Our state-of-the-art is woven acrylic fabric (sometimes sold as 'Dynel') providing a matrix for TiteBond III water-based (but 'proof') glue.

Problem is, formerly cheap acrylic went from about $5 to $25 per yard (yikes!) over the last ten years.

So we hunted around. Synthetic fabrics of every stripe were durn expensive, and we were reduced to collecting second-hand sheets (not a bad option, but take a lot of piecework).

And there was Tulle (bridal veil material)! We found some made of polyester that covered the horizontal decks of our new boat with plenty to double it on high-wear areas. All for about $1 per yard (less in quantity) through Amazon. TiteBond III is still cheap as paint.

Tulle wets down well, and the drying TBIII first layer has little problem pulling it flat (but help it along creases by spreading flat). It conforms well to tight-radius exterior and interior edges. With two coats of TBIII and topcoat of paint, the result is a moderately textured surface over a thick, reinforced film of hard-set glue protected from UV by paint.

So Tulle looks good as an inexpensive alternative to other synthetic fabrics. Time will tell... the gold standard is about 15 years.

Watch this space!


Our Application Procedure:

  1. Prep surface (smooth and tack-free)
  2. Pre-cut Tulle to fit
  3. Wet down Tulle with water (soaks the wood under)
  4. Immediately brush TiteBond III (ample, but don't sweat it)
  5. Let dry (will draw down Tulle for initial bond)
  6. Lightly sand sharp points, edges or ridges, if any and tack
  7. Apply second coat of TBIII (ample, but brush out to preserve weave)
  8. Let dry
  9. Prime while still 'green' (within 24hrs)
  10. Topcoat


One cool aspect is that, with judicious selection of products and a warm, breezy day, starting with a prepared deck we can (theoretically) manage five coats (2xTB, 1x primer, and 2x topcoat) in one long summer day. And much of that is kicking back and watching it dry.

Cheap AND efficient!

Sunday, February 16, 2025

LUTRA: One More @%! Boat


LUTRA
30ft x 5.75/4ft x 1ft
...a Sampanic Shorpie?


LUTRA -- Genus name of otters, order carnivora, family mustelidae.

Sampanic -- Having a bow resembling a sampan.

Shorpei -- Sharpie / Dory / Shorey (as distinct from any one of those?).

Meso-Cruiser -- Bigger than a micro-cruiser, smaller than a full-sized cruiser?


LUTRA: One More @%! Boat

Well, here we go again.

A quick recap of our so-called 'retirement plan'... WAYWARD, our home of the last decade is capable and comfortable, but requires a deal of physical input to sail and maintain. As we age, we expect that it would become our less mobile live-aboard. To stay mobile for longer, we added MUSTELID to the mix as an easily handled camper-cruising forager.

MUSTELID's sea trials showed us that she is more than a fair weather sailor, and quite comfortable for longer term life aboard. We feel that we could, in a pinch, make her our sole live-aboard, though in spartan fashion. By nature, however, we lean more to hedonism than asceticism.

Got us thinkin'; always a dangerous activity.

Easy handling is optimal in the smaller vessel, but maintenance on the two vessels is more than WAYWARD's alone (duh). M's lack of insulation and light build puts her at the wrong end of the comfort spectrum... for about six months of the Alaskan, rainforested year, it's cool to cold living. Stowage is minimal (only enough for about four months if depending on food stores). Tools are limited to band-aid level repairs (not reconstruction). No copper plate.

Hmm.

We decided that an enlarged version of MUSTELID would meet our needs in one package. Easy handling, less maintenance, comfortable (and better organized) living aboard with enough displacement to carry longer term gear and outfit. When we're out cruising, with all eggs in one basket we won't worry about the boat left behind.

LUTRA vs MUSTELID

LUTRA is designed on the same general plan, but 6ft longer than M and twice as deep (1ft vs 6in for nearly 2x displacement). We've raised the cockpit sheer by a foot to allow self-bailing decks, wider footing and more storage in the T-locker. The resulting, higher (and widened bow) yields more lift over seas... this might be necessary to counter the increased momentum of a heavier boat.

  • 9ft rowing cockpit (vs 8ft) relaxes our spacing.
  • 3ft aft locker (vs 2ft) adds 'deep' stowage area and extends the aft deck.
  • 12ft cabin (vs 8ft) 
    • Adds room for a small 'chest of drawers' each (more efficient storage).
    • Allows bedding to be moved forward, clearing a space for cook and fire while one of us slugs abed (we call the doubled bedding 'Cloud-Nine'  ðŸ˜´ ).
  • Double displacement floats thicker walls and double windows (improved insulation), copper plate, extra stores and gear, and a thermal-mass rocket stove (design in the works).
A longer, deeper hull, heavy bottom and copper plate will increase form stability and add considerable ballast stability for an even stiffer boat. This allows a more powerful rig, though we'll keep it snug against the sudden williwaws to which our area is prone. Dimensions shown are about the max we might be comfortable with. Reefing is (supposed to be) a snap and sheets are very easy to release, so we'll see.

In particular, we're trying another possibly hare-brained idea:

 The mid-sail is drawn quadrilateral, spread by a sprit and boom inspired by Holopuni Quick Rig. First reef is to brail the sprit vertical (leaving a Leg O' Mutton, triangular sail standing) and rotate the mast one turn to wrap sprit and bunt. From that point, reefing is all roll-furling around the mast as .we've been doing. With luck, this will retain the easy handling of the simpler, LOM (Leg O' Mutton) sails from M.

This increases sail area and drive while moving the CE aft a ways. This will decrease lee helm from the forward sails and hopefully enhance windward performance. With luck, we'll get away with hanging the off-centerboards (which double as filler planks for a cockpit platform) from the forward end of the cabin in the blindspot at the chest-of-drawers.

We've widened the sampan bow which will allow us to use a foremast case. We'll be able to drop it without lifting it clear of the partners (a spooky operation when wind and water 'get up'!). It will be self-bailing and drain clear of the water.

Another departure is eliminating the cabin tumblehome in favor of one-piece sides. This simplifies construction, adds knockdown buoyancy in the BIRDWATCHER style cabin and helps reduce rain on the windows for better visibility.

Other than that, we'll be keeping most of M's features, only adapting as necessary.

The as yet open question is whether we'll be able to row LUTRA at speeds approaching 3kts. On the one hand, her longer waterline length affords about 7kts of Hullspeed (vs M's 6 1/3kts). On the other, we are doubling the underwater cross-sectional area and increasing wetted surface, both of which increase resistance. We'll be thrilled if we gain speed under oars; content to match speed; mildly disappointed to lose a little; chagrined to lose a lot.

Time will tell!


Getting Going

We were all set to build in a beautiful, remote location near Tenakee, but not too near (allowing us to concentrate on the build). Unfortunately, some friends suffered a series of misfortunes and we stepped in. We were glad to help out, but summer and a chunk of fall evaporated with no sure end in sight. We were offered a site in town, so moved back in and got started in late September of 2024.

It's cold and slow going. We're not as resilient as we used to be. Town life is lovely as always, but full of attractions and distractions. But we're chipping away at it.

At present, the hull is complete and we are about to copper the bottom with plate stripped from WW. It's well below freezing, at present, so we're prepping the plate and hoping for a few days of higher 30ºFs/low 40ºFs to render a waxy tape (sealant for the copper) more pliable.

Here's from a few days ago:


Friday, August 30, 2024

Lofting Low


Everything should be made as simple as possible.
But not simpler.

Albert Einstein


Lofting Low

Being naturally lazy, I've spent an inordinate amount of mental energy on making boat-building easier. Over the years, whole swathes of the process have been successfully dumbed-down toward small enough bites for Anke and me to chew. Economical in time, space, money and materials.

One such swathe is is the process of lofting a vessel. 

'Lofting' is laying down the lines which define the shape of the vessel and some its components. All the individual lines need to agree with each other, meaning extensive cross-referencing and nudgings until they do. This is a finicky process, involving patience, focus and good spatial visualization.

Generally, this is done full-size or at some large fraction thereof. The resulting vessel is 3D (three-dimensional), but the lofting is generally laid down in 2D... done on a flat expanse called the lofting floor. Often, it was located in a loft under the roof of the building shed... hence the name.

Still with me?

Okay, let's take a survey of things we need:

  • A lofting space - This is generally in addition to the construction space and preferably stays available throughout the build. The lofting floor should be out-of-the-way, amply sized, smooth, sheltered and hopefully warm.

  • Esoteric skills - Lofting isn't rocket science, but neither is it run-of-the-mill. We need to understand the specification of points and lines as they relate to the plans, the techniques for laying them down, fairing, correcting and coordinating and further techniques for taking them up again to apply to our growing vessel and its parts.

  • Special tools - The more complex the lofting, the more tools we will need. Splines, ducks, tacks, pencils (of various colors?), spiling (taking the pattern of a curved or otherwise complex shape) plus related tools... and so on.

  • Time - A fair amount of it, especially if this is our first rodeo. Especially if the vessel's shape is complex. Especially if the loft itself must be built.

I can't count the number of times I've bemoaned this list, only to have someone tell me how simple and easy it all is. Only problem is that I've done it and it isn't.

Let's see what can be done to ease our way...


Simple Vessels in Sheet Materials

The first step is to simplify the problem.

Sheet materials generally lie flat or follow a section-of-cylinder or section-of-cone. Vessels built from them are a subset of shapes which - as a class - are generally much easier to loft and build.

NOTE: Sheet materials may also be tortured into compound curves but that ain't entirely simple, neither!

Simple vessels with fewer and simpler curves are easier to loft and build. In this post and lead image, I attempt a rough hierarchy of vessel shape complexity.


Lofting Space

Clearly, if we can take the loft out of lofting, we're ahead of the game.

Phil Bolger with Dynamite Payson popularized Instant Boats in their book(s) of the same name. A key feature is that the lines are laid down (lofted) directly on flat panels (e.g., bottoms, sides, decks and components) before bending into shape. Such lines are said to be expanded.

Following this practice, one eliminates the separate lofting floor. Time and potential errors are saved as most lines are directly cut to shape the panels (no transfer from loft to materials).

In our (flat and rockered bottom) builds, we've taken to building the bottom first, in sections which are finished, flipped and joined. While still flat, we use this structure as a building platform for bulkheads, sides and other components. Once ready, we assemble the structure building upwards from the bottom. This saves flipping a vessel that has been built inverted.


Esoteric Skills

By this point, the 3D shape of the vessel has been chosen and designed for low complexity. Required skills are accordingly much reduced. 

Spatial visualization is far less taxed. Cross-references are minimal and straight-forward. Curves are simple and simply faired. Corrections are mostly limited to point control (vs the correction and coordination of interrelated lines).

Design can go a long way toward easing or eliminating spiling. Box-Barge/Scows, for example are self-rectifying (if the edges meet, they pull themselves into square). Their parallel sides and dead-flat bottom sections mean 'house-carpentry' for most of the hull (no spiling at all!).

In TriloBoats, the use of whole and simple fractions of sheets mean laying out and cutting are held to the minimum, with attendant reductions in waste.


Special Tools

While a few special tools will likely be necessary in any hull shape more complex than the simple box, simplifying holds them to a handful.

In particular, simple curves allow stiffer splines that are generally three point curves (two control points - one toward each end - plus one somewhere in the middle. Unlike the more sophisticated tools for fairing complex curves, simple weights over a sharp corner suffice (of a plank, say, or paperback book).

Design can often help here, too - employing simple rectangles and arcs of a circle - to eliminate splines and rolling bevels.


Time

Everything discussed here has saved time. Time, time, time, time.

Lofting space comes 'free' with the vessel being built. This is (infra)structure right at hand (no round-trip to the loft, looking for a clue).

Simpler lines are laid down once with straight edge, simple spline and radius, and rarely 'taken up'. Cuts are made directly along these lines. Spiling is reduced.

At the extreme end (box-barge/scows) much time is saved in layout, cutting and squaring up the hull. Spiling, most bevels and all rolling bevels are reduced or eliminated.

Bolger never liked the term instant boat, but we can sure edge closer!


*****

Nothing I've written here is in disparagement of lofting or the complex end of vessel space. I love those Curvy Dogs! I respect those who lavish their skill, time, energy and passion in every aspect of their construction.

But like I said, I'm lazy. What's more...

I'd rather be sailing!


Monday, July 3, 2023

MUSTELID Venture (Video Series)

MUSTELID
Photo courtesy of David Reece


MUSTELID Venture (Video Series)

Anke and I are proud (and a little nervous) to announce that Small Boats Nation (online, and affiliated with WoodenBoat) is releasing a 15 part video series, produced by ourselves and featuring our MUSTELID Venture.

Episodes are collected in this Playlist and this Collection at SBN as they are released. This is outside their paywall, so no subscription is required to view the series.  

Episode 1 introduces us, how we live, the need and proposal for our vessel.

Episodes 1 - 6 focus on MUSTELID's goals, concepts, construction, outfit, rig and life aboard.

Episodes 7 - 14  follow our trip in MUSTELID around Chichagof Island (plus a detour).

Episode 15 takes a look back on what we learned (I'll link this once released).


Plans for MUSTELID and other designs are available at triloboats.com.


*****

Small Boats Nation has a wealth of useful information... please consider subscribing. I've written this article for them about this trip which appears in their July 2023 issue.


Saturday, July 11, 2020

Bilgin' the Barge? Reflecting on the Pond


Princess Tuvstarr gazing down into the dark waters of the forest tarn
By John Bauer


Swim out of your little pond.
-- Rumi


Bilgin' the Barge?  Reflecting on the Pond

After the first day's sail aboard our first boat - a shoal, flattish bottomed life-boat conversion - we happily went about preparing a special meal for our first night at anchor.

To our consternation, some of our stores, stowed low and outboard, were mysteriously soaked! We checked the bilge under the floorboards and were relieved to see our customary few inches of water between lead ballast bricks (as low as we could pump it)... so we weren't sinking. Some fluke?

No further problems until the next time we went sailing. With the same, soggy result.

Turns out that, as we heeled, that little bit of water all ran to and piled up the low corner, climbing above the far end of our lowest shelves. Some water-tight storage boxes did the trick, but it left a bad taste.

*****

So this is a general problem for flat bottomed boats, especially those with no rocker amidships. Not only does all that flat skim of water add up when concentrated, but when upright there is no sump (a low point which concentrates water for efficient pumping).

But do we really need or want a (wet) bilge at all?

The purpose of the bilge is to collect and contain water that makes it inboard from outboard (seeping planks, say, or leaky through-hull fittings). Or oil spills from the engine.

But there are considerable downsides:

Basically, a sailor with a wet bilge is living above a pond of... well... bilgewater. A pond is always moisturizing its environs and contributes to that dank, musty smell that many think of as boaty. Mildew and 'dry' rot fungi love the humidity. Wooden boat frames tend to rot near the standing waterline of the bilge. Most bugs die of dehydration, but not if there's a pond handy.

Bilges themselves smell better, nowadays, than in the days when raw sewage was among the fluids, but a 'sweet smelling' bilge remains rare enough to be noteworthy.

In flat-bottomed boats, a bilge must be created by raising the sole (floor you walk on) by at least several inches. Another way of putting it is that you must lower any given headroom the same amount.

Traditional construction approaches are sufficient to achieve a dry bilge. As Larry Pardey put it, would you rather pump or sweep your bilge? It requires careful building and installations, with consistent, proactive maintenance. But doable.

With modern gap-filling adhesives and milled materials, we can achieve that high bar with much greater ease. With no more skill than is required to pull the trigger of a caulk gun and spread with a paddle, we too can achieve a truly watertight hull. And preserve precious headroom!

*****

In our boats, we go without a bilge. Generally, the inside of the hull is either the surface we walk upon, or against which we stow gear and goods.

This means, of course, that if salt-water gets in, you know it right away, and it's something to be dealt with pronto! As I've written, girder furnishings help contain any leak and localize any soaking.

In all these years, we've only had salt water intrusion twice. A new mooring ring sliced through two sets of line and chafe gear in a squall, and ZOON was blown onto a rock which ground a two foot hole through her side and bottom.

A wet bilge wouldn't have helped in this case.

SLACKTIDE drug two anchors while lying unattended in a squall and spent a happy few hours fracturing a couple spots in her bottom planking, which then seeped.

A wet bilge would have made life a bit easier, but then, we may never have fixed it by patching the inboard face? We're lazy that way.

*****

Once again, each of us finds the path that suits us. Some may prefer to pump, some to sweep. Some might hedge their bets with a dry bilge on standby. Others remember the adage, a leaky boat never sinks (yer always pumpin' her!).

Keeps it interesting!


P.S.... One nifty, fail-safer solution is to build a 'step' sharpie or barge - essentially a wide, hollow, keel that can serve as a bilge in an otherwise flat bottomed hull. It only need be deep enough to do the job.

The drawing below gives the general idea... I couldn't find a pic of one applied to a flat bottomed vessel.


Modified Bolger Sharpie
Phil Bolger's BLONDIE HASLER


Sunday, June 28, 2020

SIP RIP: Deciding Against a Ply / Foam / Ply Hull

Adding inboard layer of 1/4in ply
Next space to my right has fitted foam ready and waiting
Two areas to my right, the inboard face of the hull is exposed

This guy oughtta be wearing his ear protectors!

I think I'd better think it out again!
-- Fagin, from Oliver! lyrics by Lionel Bart

SIP RIP: Deciding Against a Ply/Foam/Ply Hull

A friend of ours built a shop with reclaimed Structural Insulated Panels (SIPs). It flew together, was obviously superbly insulated and was strong and stiff.

But commercial SIPs aren't typically geared for marine environments (though I wish they were). Custom orders are possible but too spendy for us. With tape n' glue construction, these would be the bomb. Sigh.

DIY ply/foam/ply adaptations seemed within our reach, and they were. We've now built two boats with two approaches, and both worked out (WAYWARD's example). But, looking back, we've (pretty much) decided not to do it again.

Insulation (R-value) is awesome and totally stopped condensation. Positive buoyancy is a benefit we hope never to call upon. But...

Here's a list of cons:
  • Framing is necessary, finicky and expensive.
  • Through-hulls need blocking (in advance or retro-fitted).
  • Installing foam and inner ply is time consuming and adds cost.
  • Voids (which can rot or mildew) are difficult to reliably avoid.
  • They can't be disassembled for inspection.
  • Foam takes away from interior volume.
  • Foam adds fire hazard with toxic smoke.
  • Foam is a pile of plastic waste that can never be "disposed of properly".
Framing deserves special note, and is what truly tips our scale.

Its purpose is to take fasteners for furnishings (vs. epoxy welding or tape n' glue which we prefer to avoid), tie the inner skin mechanically to the outer, join panels and seal edges (as around window cut-outs). It must be well-planned, precisely installed and devil take those who change their minds. Corners are particularly aggravating, and may need doubling up.

So what's our alternative?

We now lean toward two layers of ply, laminated (we like an LPC such as Gorilla Glue for this).

Condensation is much reduced by 1in of ply, and 1 1/4in (using one layer of 3/4in for accepting fasteners) takes it down to near none. While insulation is relatively low compared to foam, it's still adequate. Strength is high. Buoyancy is still positive, though reduced. It weighs a bit more. Cost is oddly about even (pound for pound, thinner ply is generally more expensive).

Best of all, interior framing is eliminated... you can fasten anywhere into the wall or drill right through it without blocking.

TriloBoats are intended to be quick and simple as possible. We've found that ply/foam/ply in the hull sides run against that grain. While the results are good (at least in the shorter term), we feel that the net benefit doesn't pay for the effort.

Should we build again (please O Great Spirit, NO!), we'll continue to use a SIP approach for the main deck but go to a solid wall hull.

So R.I.P., S.I.P.s.

Saturday, January 11, 2020

Models and Mock Ups

Building it isn't TOO much harder
(a LOT more expensive, though).


Shall we have an adventure now,
  Or shall we have our tea first?
-- From Alice in Wonderland by Lewis Carroll

Mock Turtle Soup: Models and Mock Ups


If a picture is worth a thousand words, I'd say a model is worth a thousand pictures. I reckon that makes a model worth a million words!

It doesn't have to be a museum piece. Building in scale is important, so you can measure directly from the model. The more detail you build in, the more you'll solve and anticipate problems ahead of time. But TriloBoats are boxes... there's not so much to figure out on that score.

Note bulkheads, deck and framing lines...
almost all layout happens on sides or bulkheads.

We used doorskin (this time) and cardboard, held together by hot melt glue. Crude, but tells us all we need to know. A couple of scale models of ourselves (and a pet or two have since materialized) to picture lines of sight and boarding issues and there ya go.

We laid out the principle (side) component landings, and window cutouts.

Next step is to start marking it up with material counts:
  • Ply Sheets -- Sides, bottom, bulkheads and transoms, decks... each gets written up in place.
  • Copper Plate and Angle -- Sides and bottom; along both chines.
  • Framing -- Chines (bottom and sheer) and nailers, bulkheads and transoms, decks.
  • Nail Counts -- Parallel to framing, one or two sides... How long? How often?
  • Surface Areas -- How much for paint, sheathing, glue?
Writing our results in place beats a list by far... we can see at a glance what we've counted, and what not. Much less likely to over or under count. A different check mark for each pass through lets us check and recheck.

And we can just sit there and stare at it!


Amazing what cardboard and hot-melt glue can do!


*****

Mock-ups are different. The trick here is to be able to get the feel of a feature in full size.

We've got a collection of chairs, tables and counters picked out that we can go to for the feel of things. We might set up a mock 'gangway' to get a feel for how tight things have become in our present state of 'middle age spread'. And maybe a (literal) fudge factor? A strip of plywood simulates the overhead.

We like to look down (not just out) from our windows to see what's happening close up. This ability is affected by the height of the lower window opening and our distance from it (the closer we sit to the window, the lower we can look over the frame). Mocking up lets us see how our furniture height and location will interact with our view.

Window height has been a big issue for us. Here, we mock up the shortest windows in prospect, in their correct location on the sides.  If these are okay, the rest is gravy.

And it's okay.


Not a bad view for below-decks in a sailboat!


*****


Same table, different model.

Monday, November 4, 2019

Going Nowhere

Elev. ~20ft over low water

Going nowhere isn't about turning your back on the world;
It's about stepping away, now and then,
So you can see it more clearly
And love it more deeply.

-- Pico Iyer


Going Nowhere

It was a dark and stormy night...

Wait. No. It was bright and balmy day. We had turned the corner from Chatham into Peril Strait, cutting through Morris Reef as we've done a hundred times.

But this time, we were continuing the turn into Sitkoh Bay, intending to skirt the outlying reefs along the inside corner. We'd threaded the reef on the last of the rising tide, and it was now starting to fall. What's worse, it was now past top of springs (tides getting smaller for the next week and wouldn't be this high again for two weeks). Flat seas, that day, but forecast SE 20kts rising to 30kts (from the worst quarter) with seas 4 to 6ft for the next day.

We took bearings from the chart and gave ourselves some extra margin. Not enough as it turns out, and definitely given those italics above.

Anke had the good sense to think one of us should be at the bow (me saying, "Only if you like... we're well clear!"). She wasn't even all the way forward before she called out, "Hard to port!"

I duly put 'er over hard, but too late. We fetched up mid-ships against the only point in the whole durn area that could have caught us, a little 4in pinnacle standing atop a sunken hill.

In 30 years of sailing cheek on jowl with reefs, this is only the second rock I've hit. Ironically, the first was about a hundred yards away (broke my rule about running through unscoped kelp patches) and about a mile from where we spent a few memorable days on the beach.

This one was a doozy!

Initial assessment showed a couple knots of current held us pinned against that toe-stubber at about our Center of Lateral Resistance (side point around which a boat will spin... or not), so we:

  1. Tried to spin off under sail... not enough wind to overcome current.
  2. Tried to pole off... not enough strength at a steep angle.
  3. Stepped onto the rock and tried to push off by hand... we were on a peak and I couldn't step far enough away from the CLR to gain leverage.

    By now, we're starting to settle on whats showing as a small, thwartships ridge a foot aft of CLR. It's no longer just current we're fighting, but gravity.
  4. Tried levering off... ditto.
  5. Tried lever + handybilly... double ditto.
  6. Rowed out a kedge... by now, we're settled too hard to shift, even with capstan assist.
Okay. At this point, we give up on trying to get off the rock, and turn toward stabilizing ourselves on it.

Luckily, that ridge was plenty long enough to support us across the bottom. No fear of tilting and falling sideways. But, being a ridge, it was like a teeter totter with the big kid at the bow. The bow started to settle, and our stern reached for the stars.

Our first impulse and effort was to lash some fenders under the bow for a cushion. But it soon became clear that even with their extra height, we would be dangerously bow-down by the time they fetched up. At worst, we'd nose-dive down the hill and fetch up hard.

Sooo. We had plenty of firewood... we were able to post two pieces on end - one on each side, about 4ft forward of the fulcrum point, standing on the rock and shouldered under the bottom. Further settling of the bow was stopped, and we could breathe a little easier as the water ebbed away.

Fortunately, we could move freely around the boat without our weight being an issue, though we were pussy-footing, to be sure. Didn't want to shake ourselves off those posts!

We rested a bit and had a meal. What a view! The sun was getting low over two of SE Alaska's great waterways. First snows on the peaks all round. Us in the high bleachers, looking down upon it all. Warm food, coffee and time to think out a plan.

Kinda like yoga.
Doesn't really catch how high up we were!

First thing was to run the numbers. Check the tides, calculate ranges, apply the Rule of Tenths. Check it twice. Safe by a foot... we would float in the very early morning.

Next, we contacted the Coast Guard to let them know our situation (about which they would likely get some calls from passing traffic), and that we had it in hand.

We reset the kedge further out in sandy bottom, well off the port quarter (the free shot out).  Set up a snatch block for the anchor line to lead it fair (from directly forward) to the capstan. This let us use nearly its full power.

Before calling it a night, we added two more rounds of firewood lying flat, aft of the fulcrum. Our thinking was that, as the bow lifted and stern lowered, we would rotate around those, lifting up and away from the stone fulcrum. Any wave-induced pounding would be on a more forgiving surface.

Oh. And I took a sledge to that 4in pinnacle and beat it flat. If we were going to bounce in the morning, we sure didn't want it poking up at us!

Approximate line of 'our' rock...
Post and round drawn in brown.

In the wee hours, the tide duly came back, and as promised, lifted us free, aided by light chop. We waited until we were just quivering before hauling the kedge line bar taught. 

Within a few minutes, we slipped free in two lunges. No grinding, no damage.


*****

As you may have noticed, there was considerable luck involve, good and bad, as is the usual case.

If we'd been half our beam in either direction, it would have been a close call but no contact.

If we'd hit that pinnacle a few feet from CLR, we could have spun off.

If the rock had been flatter (longships), we could have spun off.

If it had been too much of a steep rock, we could have slid off either forward or sideways.

As it was, we were reminded again how forgiving ultra-shoal draft boats can be, particularly those with flat bottoms. 

We appreciate the virtues of girder construction. You can see how rigidly our stern cantilevers. The wide, flat, rigid bottom facilitated posting to limit rotation.

These two features most often mean that, even if a strong sea builds up, we can get out with little harm from a scrape like this. As the tops of the first waves lift us, the kedge pulls forward. Only a small drop and crunch are likely, and only a few of those.

All in all, however, we count our lucky stars.


*****

On Appraisal, we draw these reminders and lessons:

  • Always give extra margin on falling tides, especially falling from springs to neaps!!
  • Remember that reefs and shorelines are rarely accurately charted!

    Pilots advise traffic keep whopping distances off visible landmarks. We run reefs all the time, but when skirting need to be on full alert or follow the pilot. Extra wide margins! Lookout at the bow!
  • Set a kedge early!

    We dillied and dallied too long, partly as it was a foul spot; easy to lose an anchor. Still, anchors are cheap relative to risking the boat, so delay was a poor choice. For ultra-shoal, it's not usually the first response, but shouldn't be delayed long. It's our heavy lifter.

*****

We met thirty some years ago at the Pioneer "P" Bar in Sitka, AK. Its walls are covered with photos of boats on the rocks. Not exactly a Hall of Fame, but rather a Wall of Infamy.

We finally earned our spot!

Thursday, April 12, 2018

A Look at Box Barge/Scow Sailing

SLACKTIDE sailing to windward in about 20 knots of wind.
For some reason, the fairly extensive white caps didn't show up,
and I apologize for the wind-in-mike effect.


If a pitcha's worth a thousand words, how much fer a movin' pitcha?


A Look at Box Barge/Scow Sailing

If one were to go looking for some video of cruising-sized, box-barge/scows under sail... well... it's thin pickin's.

Despite the fact that sailing barges and scows once carried a good deal of freight in Europe and North America, very little information as to how they sail is readily accessible (okay... google, right?).  One can only infer that their numbers prove they must have been able to compete against curvy dog rivals.

We had extensively sailed LUNA, a fine sailing hull modeled on Phil Bolger's AS29. It's a square sharpie... much like a barge, but with ends pinched in. It's full rocker sets it off from the large, mid-ships deadflat that help keep Triloboats relatively quick and easy to build, and was a common feature of the sailing barge/scows of yore.

We reasoned that the barge/scow form couldn't lag too far behind. But as a precaution, we built SLACKTIDE as a proof-of-concept before committing to WAYWARD, a full-sized liveaboard cruiser. After all, sailing engineless in SE Alaska, ya need to be able to get out of yer own way!

To make a long story short, box barge/scows sail reasonably well. We've had no problems going anywhere we wish, and that involves many places and situations most wouldn't care to take their sailing home, no matter its capabilities.

Things I note about box barge/scow hulls:
  • Heeled, they present a V to the water.
  • Upright, their entry is rather fine (directing water downward for lift, rather than parting to either side... this is true even with relatively abrupt bow curve).
  • Easier aft curves release water well and make for an easier driven hull.
  • More abrupt forward curves don't seem to hurt, and do seem to reduce pounding.

The videos embedded here allow a look at how three models sail. Cast of Characters as follows:

SLACKTIDE (26x7x1) is a Triloboat Junk cat-Ketch with rather abrupt end-curves, intended to prioritize carrying capacity over speed.

SPIRIT (36x12x?ft) is a Civil War Cargo Scow gone Blockade Enforcer, with easy lines prioritizing speed.

ALMA (60x22x4 is a San Francisco Hay Scow Schooner. Her lines are quite abrupt with a long deadflat, prioritizing heavy lading.

So here ya go... a movin' pitcha look at box barges under sail:


SLACTKIDE running under reefed sails in confused seas


SLACKTIDE close-reaching in light air.


SV SPIRIT sailing on several points.
Note the view of the bow waterline... not much fuss.


This hull, compared to the others, is a relative pig to handle, 
yet comes about slow but sure.