Please visit our home site at www.TRILOBOATS.com.

Anke and I live aboard WAYWARD, and wrote about it's design and construction at ABargeInTheMaking.blogspot.com.

Access to the net comes and goes, so I'll be writing in fits and spurts.Please feel free to browse the archives, leave comments where you will and write... I'll respond as I can.

Fair winds!

Dave and Anke
triloboats swirly gmail daughter com

Friday, December 16, 2016

On a Cold and Dark December

Snow Storm: Steam-Boat off a Harbor's Mouth
By Joseph Mallord William Turner

...
While listening to the moaning of the wind, 
And thinking what a solemn thing it was 
To move on 
Through the lonely darkness, 
Over an unknown abyss, 
Whose depths were secrets as profound as Death
...

-- From A Christmas Carol by Charles Dickens


On a Cold and Dark December

This time of year, in the waning of the last moon, in advent of the longest night, my thoughts turn to those who have made their living on the sea.

It is said of the artist, Joseph Turner, that he asked to be tied to the mast of a steam-boat leaving Harwich in a storm.

Leaving. Harwich. In a storm.

We're talking the German Sea of the North Atlantic. The graveyard of the Spanish Armada and countless others, beside. Legendary for its ferocity. Merciless.

They left by soundings, tapping their way with line and lead over and between invisible shoals that could wreck them. Heading into the storm.

For the artist, tied to the mast, his terror and awe were poured onto canvas, capturing a furious moment for all of us not so exposed.

For the crew... well... it was just another day, another night at sea. A schedule to keep. Likely setting forth at the end of a long day of lading. Weary, but ready. The tools of their trade well in hand.

Not one of them were tied to a mast or to anything else, for that matter. One hand for their selves, one for the ship. Blow high, blow low, blow sideways.

We sailors of the present day have seen a thing or two. Nights when it's darker than dark. When snow blinds us and the wind shoves us at the unseen shore.

But those sailors! Those sailors were made of sterner stuff than can be found in our easy times.

On a cold and dark December...

...They took to the sea.


Sunday, December 4, 2016

Q&D Shelves


Wish I had a pretty little girl, 
I'd put her on a shelf, 
Every time she'd wink her eye 
I'd climb up there myself.
 -- Old Joe Clark


Quick and Dirty Shelves

Boats can have a lot of shelves in them, often in odd spaces. Over time, we worked out a formula that  lets us zip 'em out without a lot of head-scratching.

Basic idea is that a (plywood) shelf between walls (dividers, bulkheads, what-have-you) has a support rail attached along its lower, far edge, and a fiddle/support rail attached along its upper, near edge and overlapping the Cleats. 

Cleats are attached to the vertical walls at either end, with room for the support piece to slip behind with a little wiggle room. This locks the shelf against horizontal movement (may need screws if you anticipate tossing them vertically!).

Advantages include:

  • Quick, standardized construction
  • Easy installation and removal (for cleaning, painting, etc.)
  • Flexibility (can be adapted for size, loads, clearances)
  • Uses up a lot of smaller plywood offcuts
  • Relatively easy to go back and rework spacing, if desired (just move cleats)

If you wish to get a bit fancier, the fiddle can be rabbeted along its underside to cover the raw edge of the shelving material.

You can angle the far end of the cleats to a point... this allows the shelf to be lifted upward as if it were a lid, rotating around its far edge in contact with the points, until the support face fetches up against the angled cleat end (the sharper the angle, the higher you can lift the shelf). This can be useful in tight spaces where you need a little extra room to un/load the space below it. For example, a tote that fits snugly may need a little extra to clear fiddles and such along its near, lower edge.

We found that our locker openings don't let us insert full length shelves. We ended up cutting this type in two, mid-length, and putting a lip under one of them along the cut. A short, rabbeted piece is attached to the back wall, rabbet up, straddling the cut (also with a little wiggle room). The lipped side needs some support at the near, cut corner... we use twine attached to the next fixed point above it, rather than build struts. This approach has been much easier than installing a divider, and doesn't break the run of shelf length.

An idea to shelve away!


*****

Bonus Tip:

Can't recall where I read of this, but could well be The Sailor's Sketchbook by Bruce Bingham, under 'removable fiddles'.

Another simple locking device is to make pegs that fit into matching holes. These can be made of wood or metal.

One cool way to do it is to drive a (bronze) screw in the peg location, burying the threads but leaving the shoulder exposed. Hacksaw the head off and smooth with a metal file to leave a protruding peg. Put the piece (shelf, removable fiddle, table, etc.) in place, over its supporting surface and tap over the screw with a hammer, denting the receiving surface with the exposed peg. Drill a (slightly loose) hole at that spot. If everything is done reasonably square, the peg slips into its hole, forming a sheer lock, preventing horizontal movement.


 Bonus, Bonus Tip:

A recent brainstorm is to use heat to flatten and shape PVC to form springs. A hole drilled through the PVC to match a peg forms a lock that can be released (sprung off the peg) with gentle pressure.

Works for door latches, removable step locks, drop down bin locks, hatch locks... spring shapes  and applications are limited only by the imagination!.

You can find lots of info on shaping PVC through sources like this one, drawn from the way-too-cool world of PVC bow-making.

Friday, November 25, 2016

Peace Like a River

A scene of Thanksgiving

Give me peace like a river,
Give me love like an ocean,
Give me joy like a fountain
In my soul,
In my soul.
-- African-American Spiritual


Peace Like a River

Water is the foundation of all life.

We're mostly made of water. Our blood surges with the moon, washing in waves through heart and mind. Deny us water and we wither and founder in short order.

"Ashes to ashes, dust to dust," we say, affirming between the words that water is life.

For the last too long, Anke and I have been building a new home on the shore side of water's edge. Our foundations firm in ashes and dust. Sleeping in a cradle unrocked. Dreaming of the other side - the wet side - of the line between sea and shore.

But we've crossed over.

Our vessel is set upon the sea, and our selves again with it. Once more, we rise and fall with the world's tides. Once more, we breath a little easier; sleep more deeply; dream  more expansively.

Awaken more eager to meet the new day.

*****

When we first sought the life afloat, we walked the strand, looking to the boats sailing free and easy beyond our reach. Waterborne and lifting to wave and send. How we envied them! Imagining the feel of their pitch and roll as if dry land could liquefy and buoy us.

Our first night on the water... aboard a vessel of our very own... how can I describe it? We thrilled to every complex motion. Each lip and lap of water against the hull. Each tremulous touch of distant, hydraulic force seething beyond the river's mouth. Peace like no other.

Our first voyage... fraught with perils real and imagined. Ocean teaching us at every moment, guiding us by its touch... at once intimate and indifferent. Love for this as reflexive as breath.

Our first harbor, safely reached... greenhorn heroes' voyage at its triumphal end. Fears faced and unlooked-for courage found. Hardships endured and overcome. One small victory hoped to be the first of many.

Joy like a fountain in our soul.


Here they lie where they long'd to be;
Home is the sailor, home on the sea,
The sailor home from the hill.

Apologies to Robert Louis Stevenson's Requiem


Wednesday, October 12, 2016

Can Stoves Can Do

By Gary Larson

When you light a fire, you commit an act of magic...
What thrilling enchantment, 
What cunning sorcery, 
Has the work of your hands created?
-- Anthony Murphy


Can Stoves Can Do

Anke and I spent many a pleasant summer evening, this year, watching the sun go down in the company of a (tin) can stove. A hot meal and spruce tea with the smell of woodsmoke on the air...

Cans are amazing resources.They're to be found anywhere and everywhere. They can be bought brand new with a bonus load of... let's say olives. Recycling centers have dumpster loads of them in a variety of shapes and sizes. Paint cans and buckets can be bought new and empty. For the improvised galley, they can easily be worked into pots, pans, mugs, bowls...

And stoves! Biomass fueled stoves that last long enough to pay handsomely for the effort invested. Biomass itself is inexpensive and nearly ubiquitous... wood, weed, manure and peat. With a fire-proof base (e.g., a gravel box), they can be used aboard a boat of most any size.

Can stoves cost next to nothing, contain and enhance the efficiency of an open fire and are scalable to most any need. They're made from various combinations of cans, including those for canned foods, paint cans and buckets or even stove-pipe, various pots or ammo cans.

A 55gal oil barrel, anyone?

Can stoves do burn out in a season or so of use. While a can-opener, nail and rock are all the tools necessary, I recommend investing in a good set of tools - tin snips, pliers, drill and step bit, awl, file(s) - that let one replace as necessary. Each replacement is an opportunity to experiment with a new design or refine an old one.

Here, I'll present three types made from steel ('tin') cans (Hobo, Rocket and Gasifier stoves), and two made from aluminum 'soda' cans (Wick and Penny stoves).

These featured are starting point for the pyromaniacally mad scientist. Can proportions; hole sizes, placement and frequencies; cutouts; airflow channels; open top/bottom designs, pot/pan supports, handling... all afford plenty to dink with. It's a vast world of possibility with lots of info on the net. Here is a visual sampling.

Or you can simply copy a proven design. It's hard to go too far wrong.

Remember, cut cans are sharp and can generate nasty cuts. Wear gloves and eye protection when building stoves. Smooth the edges as well as practical, and stay alert when using. Also, fire is inherently dangerous. Use all precautions, including having extinguisher technology at hand while using.

Let the Flames begin!

*****


Full article at RemoveAndReplace.com

Hobo Stove

This is the simplest type, extensively field-tested during the Great Depression. They're not terribly efficient (though much more so than an open fire), and produce a fair amount of smoke. Be sure to breath as little of that as possible!

At minimum, it's a top-loading can with lots of air holes. Refinements limit and focus hole spacing, add fueling ports and pot/pan support. The one shown above is a decent model.

If the top is left intact (unopened end of a can positioned UP) it can be used as a cooking surface. But heat isn't easy to control, and I'd consider that a fall-back option.

*****


Full article here.


Rocket Stove

These are a big improvement in efficiency over Hobo Stoves.

They work by setting up a powerful draft blowing through a sharp-angled, insulated burn chamber. Oxygen is abundant and well mixed with combustion gasses at higher-than-normal temperatures for an efficient, low smoke burn. The roar of their draw gives them their name.

All sorts of non-combustible materials can be used for insulation, but the more air space is trapped, the better the insulation will be. The less its thermal mass, the sooner your chamber will reach its maximum temperature.
SQUARE BOAT NOTE: If, like me, don't like fitting curves to curves, combustion chamber/chimney designs can be adapted to cans that have been squared after cutting off their ends. They will meet at 45deg.

 *****

Full article at The-Knowledge.org
  
Gasifier Stoves

These are another set of efficient designs which first pyrolize their  fuel (i.e., using primary combustion heat to drive off combustible gases from the fuel and carbonize the remains) and then burn the gasses. This principle has been used to fire internal combustion engines for transport and electrical power production.

The link given above is for a simple model, used in a simple mode. Very similar alternatives include TLUD (Top-Lit UpDraft) Stoves. Despite their resemblance,  these work on a different principle. This one features a more precise build with high-end tips you may wish to apply to other stoves.


****

Aluminum can stoves burn alcohol, rather than biomass. They can be considerably more sophisticated (and finnicky) than those listed above. I've heard they don't work as well in very cold weather. But they are the last word in ultra-light stoves.

Here's a general principles article to get you started.


Can't find who drew this up... How-to article here.

Wick Stove (aka Soda Can Stove)

These work by saturating the wick with alcohol. It evaporates, and the gasses are burned. Some models feature a lid to snuff the flame and preserve fuel for later, others merely let the fuel load burn out.

Here's a variation that's a bit simpler to build, with some cool accessories.

*****


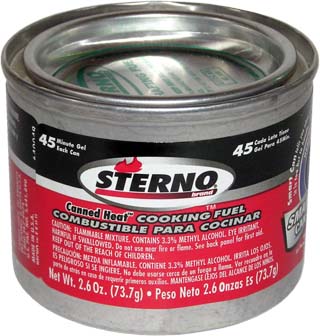
Zen Gelled Alcohol Stoves - Sterno-like Stoves

Gelled alcohol commercial product

Gelled Alcohol

Gelled alcohol is primarily used for chaffing dishes (serving dishes kept warm by the flame), but they're great for camping and micro-cruising. Stands are cheap, and easy to DIY (can even use a can... do the Can-Can!).

BTUs are somewhat low by volume, so they're slower. Many are methanol based for higher BTU. Methanol is poisonous, so don't cook directly over the flame, but use a pot (AND extra-good ventilation!).

The gel is nearly spill-proof, and better, can be made DIY. Best of all, the ingredients (shells, vinegar, alcohol) can all be DIYed in the field, making this a long-range option. Larger surface areas (bigger diameter cans) can help overcome lower BTUs/sq.in.. 

Check out this article for a recipe. 


*****


Can't find who drew this, either... Inventor's home page, here.


Penny Stove

This one uses a penny's weight  to regulate fuel flow rate. The how is simple but the why complicated.

When all is in good proportion, their flame jets are a thing of beauty. They're considered by many hikers to be the ultimate in ultra-light heat.

*****


There's something about an open fire. Something deep in the blood as we stare into the eyes of our companion of a thousand generations. Our worst enemy, it is said, and our best friend.

But something, too, in fire contained. Focused. Intensified.

We are apprentices of fire's alchemical magic. We seek its ways. Learn to feed it while avoiding its bite. Learning to excite its passions without being consumed by them.

Together transforming dull matter into heat and light.

Sunday, September 25, 2016

THE COMPLETE SAILOR: A Review

Splash page from The Complete Sailor, 1st Edition
Joshua Slocum on SPRAY by Mark Whitcombe


Long before a wheel rolled, some shaggy fellow straddled a log or sat on a raft and held up something to catch the wind.
-- From The Complete Sailor


The Complete Sailor: Learning the Art of Sailing 
By David Seidman
Art by Kelly Mulford, Mark Whitcombe (1st Edition) and Jan Adkins (2nd Edition)
Review by Dave Zeiger

I'm a modular kind of a guy. 

I like to have things broken down into bite-size, manageable pieces that can be combined and compounded every which way, adapted to whatever situation presents itself. It's the way I think.

So does David Seidman.

The Complete Sailor presents sailing knowledge and skills ranging from essential basics through solid intermediate level, and touches on more advanced topics. 

Wind and water, sailing and anchoring and docking, marlinespike skills, charts and navigation... it's a long list of things to know. Each topic is covered in an easily digested page or two.

Seidman's prose is at once spare and flowing, covering the ground with a sure and easy stride. Mulford's illustrations are as evocative as they are informative. Together, they speak volumes in simple terms. Simple though it be, each time I open these pages I learn something new. Connect new dots and deepen my understanding.

This is one of the two friendliest how-to books on sailing I know (Jan Adkins' The Craft of Sail is a similar but less ambitious introduction, and now he's on board for the second edition). If you - like me - struggle through the dense and endless prose of such tomes as (the admittedly encyclopedic) Chapman's Piloting & Seamanship, you'll appreciate the lighter touch.

Another point I appreciate immensely is that examples are drawn from across a wide spectrum of vessels and their rigs. Not only the latest extrusions, but traditional and even funky boats are well represented. From balsa rafts to clipper ships. From Jeanneaus to JESTER. One can almost smell the pine tar!

This isn't a book written solely for trendsetters, but also - even primarily - for those of us going to sea by the means at hand.

So many books on sailing somehow manage to lose sight of the romance - the dream - of sail. Reading them, it's easy to imagine that seamanship is little more than another exercise in consumerism. That, with informed purchases and proper use of appliances, the world is your Disney. Or the other hand, perhaps worse, that the learning curve before us is so steep and long that one is discouraged to begin.

Dreams are delicate things. They often don't survive the necessary, accumulation of nuts and bolts and know-how that empower them. They get lost in data, overwhelmed by 'practicality', bogged down in tedium, abandoned in despair.

This book pilots us safely. In its care, we circumvent shoals of ennui and reefs of detail, enticed ever forward, eyes lifted at every league to the horizon...

The Complete Sailor is a gift to all of us who dream of water.


A sample of Kelly Mumford's excellent illustration


*****


PS. The first edition features gorgeous chapter headers (such as that leading this post) by the late Mark Whitcombe. In the second edition, his artwork has been replaced by the work of Jan Adkins. 

While I'm a big fan of Jan's, I miss Mark's touch. The extra materials - GPS, Racing and Trailering - aren't on my need-to-know list. For these reasons, I favor the first edition. 

But both are excellent.


PSS. If nothing else, keeping a copy on board for guests is something I highly recommend. Sitting down with this book between us beats the oakum out of my own, unaccompanied words and doodles.


PSSS. I just found out that Kelly Mulford passed away in 2011. You can read his cousin's memorial post, here.


Friday, September 16, 2016

TriloBoat Styles: Fitting Form to Function


Real style is never right or wrong. It's a matter of being yourself on purpose.
-- G. Bruce Boyer

If you obey all the rules, you miss all the fun.
-- Katherine Hepburn


TriloBoat Styles: Fitting Form to Function

As kids, my brother and I got a lot of mileage out of empty cardboard boxes.

Anything from apple to refrigerator boxes got taken to the moon (space ships), to the bottom of the sea (submarines), across the Great Plains (conestoga wagons), over Niagra Falls (barrels rolling down the hill in our yard). We cut windows and gunports and portcullises into them as 'need' arose.

Something must'a stuck...

*****

I recently worked up StudyPLANS for a T20 side profile (MATCHBOX). By matching beam, super-structure, interior and gear to intended use, a builder can go in most any direction.

The above graphic, showing some approaches I favor for such a small vessel,  represents a pretty fair cross-section of the TriloBoat bestiary, to date.

Box barge hulls are exceptionally versatile foundations for tailoring to any nautical purpose. They carry loads well on stable footing, have lots of working deck and interior volume. Parallel sides ease construction (especially over the mid-ships deadflat) and make the most of their ends (think wide bunks, foredecks and cockpits).

All this, and relatively fast and inexpensive to build!

The approaches shown are just the tip of an iceberg of imagination, possibility and compromise. Innovate; copy; modify; shake 'em up; put 'em in a blender!

What might you do, given an empty box?


*****

A few that got left out:

SCUTTLEFISH
(BIRDWATCHER style)

CARGO

SHANTY

Idea for a container boat...
They dont HAVE to be boxy!


Tuesday, September 6, 2016

A Square Jig for Square Boats

Holes range from 1/4in to 1/2in
May add 7/8in and 3/4in, someday


We meet upon the level, and part upon the square.
 -- Masonic Proverb
 
A Square Jig for Square Boats

Can't say I'm a jig kindofa guy.

When building TRILOBYTE on the fly, a friend stopped by to see how we were doing. He's an ex-shopteacher/current bowyer... standards are high. 

The task at hand was drilling the side windows for screws all around their perimeters.

Our usual approach is divide-and-conquer. This case was an eight foot stretch and we wanted fasteners every six inches or so. Open spaces are divided by twos or threes as seems right by eye. If we're feeling persnickety, we might measure and mark it, using a chip of wood to inset it. But we don't often.

Eight, four, two, one, half-a-foot. Shazaam.

This was a little too quick and dirty for our friend. He gave us a passionate speech on the virtues of precise patterns - how it was the mark of a professional. That it went quickly and looked its best.

We hemmed. We hawed. To show us how easy and efficient it all is, he volunteered to make us a jig.

He did, too. A nice li'l number that worked like a charm. A rabbeted slide with guide holes precisely placed. A thing of beauty, form and efficiency.

Problem is, by the time it was done - a matter of a half hour or so - we'd already drilled AND mounted all the windows.

Looked fine, too. Even he admitted it.

*****

One more story...

When computer generated music first came out, it sounded flat. Robotic. Lifeless.

Why? The algorithms were perfect! Every note was precisely on pitch. Sounded for exactly the duration specified. Attack, reverb and fade were mathematically true to the nth decimal place.

Sucked.

Turns out, the human ear doesn't care for too much perfection. Finds it sterile and uninteresting. Got no soul. Turns out, introducing small errors of pitch, tone and timing brought it alive to us. Turns out, we prefer our imperfect, gritty, wonderful world with all its flaws. We insist on them.

I'm sure there's a lesson in there, somewhere.

*****

So I'm not a jig guy.

But one thing that does come in handy in a square boat is a hole bored square to a surface. Not only handy, but if it's not square, often enough it's gotta be plugged and drilled again. Otherwise a fastner might not pass through its hole in a metal plate. Or a fastner head, washer or nut won't sit flat and water intrudes. Or the durn thing comes out the side.

A square jig for a square boat helps us along.

Next time you're near a drill press, I recommend this:

Start with  a nice, rectangular chunk of stock - hardwood or aluminum work easily and hold up.

Inset a line of squared off holes of standard sizes along edges - just enough room for your drills when pressed against a wall.

To use, align a face of the jig with the reference face to which your hole will be square or parallel. Run your drill through, or at least far enough to continue square without the jig.

Unless the jig is clamped (seldom necessary), I find it helps to withdraw the jig with the bit, rather than the bit alone. If you get off line withdrawing a running power drill while still in the jig, it can get jumpy.

It helps if the jig is big enough to clamp a bit of stock to faces as a guide if a necessary to reach a reference face. For example, when drilling bolts for the handrails (whose upper face had been rounded) we used their sides as reference and drilled parallel to that face and square to the run of the upper face.

This jig - with some extra long bits - has given us quick and easy square holes, every time we've needed it.

Guess it's alright.


Anke drilling with our first, 1/4in jig
Note board clamped to side as guide along handrail sides
for square, plumb and level